Vehicle Design Project
Abstract
This is a hands-on, project-based course that guides you through the process of creating a customized 3D car model using AI tools, refining it in Nomad Sculpt, 3D printing it, and transforming it into a fully functional 4WD remote-controlled (RC) vehicle. The course combines creative design, digital modeling, physical prototyping, assembly.
What You Will Learn
-
How to use AI tools to generate 3D models of vehicles
-
Techniques to import, clean, and refine models using Nomad Sculpt
-
Customization of car components like bumpers, skirts, spoilers, etc.
-
Preparing and slicing models for 3D printing
-
Basics of 3D printing and post-processing techniques
-
How to assemble a Tamiya 4WD chassis
-
Presenting and testing your final product
What You Will Need
| Category | Item | Notes | Required/Optional |
|---|---|---|---|
| Hardware | Smartphone/Tablet | With stylus support recommended | Required |
| Laptop/Desktop | For slicing and 3D printing | Required | |
| FDM 3D Printer | e.g. BambuLab | Required | |
| Resin 3D Printer | for better finishing e.g. Phrozen | Optional | |
| Tamiya 1/32 Scale mini 4WD pro series car kit (MA chassis) | Chassis for the car model | Required | |
| Software | AI Model Generation | ChatGPT, Tripo AI | Required |
| Nomad Sculpt | iOS/Android – paid | Required | |
| Nomad Sculpt Quad Remesh extention | iOS/Android – paid | Optional | |
| Slicing Software | Chitubox, Bambu Studio | Required | |
| Tools & Materials | 3D Printer Filament | PLA or PETG recommended | Required |
| Finishing Tools | Sandpaper or rotary tool | Optional | |
| Painting tools | Brushes, acrylic, Airbrush or spray paint | Optional | |
| RC Control System | Beets motor unit | Required | |
| Assembly Hardware | Screws, brackets, and mounting accessories | Required |
Course Outline
Chapter 1: Introduction to AI-Driven Design
- Overview of AI 3D generation tools
- Limitations of AI generated 3D models
- Exploring car design prompts and outputs
- Generate a car model image using ChatGPT
- Use the images to generate 3D models using Tripo AI
Chapter 2: Sculpting Foundations in Nomad Sculpt
- Introduction to sculpting interface
- Importing and repairing AI-generated models
- Cleaning geometry and optimizing meshes
- Refining car body shape and proportions
Chapter 3: Customizing the Car
- Adding car skirts, bumpers, fenders, spoilers, etc.
- Feedback sessions on design choices
- Exporting final car body for print
- Assemble the Tamiya 4WD chassis and learn how the car cover should fit and being assembled.
- Use the provided model to shell and cut out parts in order to fit onto the 4WD chassis
Chapter 4: 3D Printing
- Introduction of different 3D printing methods
- Exporting STL files and configuring printer settings
- Model slicing basics: orientation, supports, infill
- Slice and preview print in Bambu Studio
- Operate a 3D printer and print
Chapter 5: Post-Processing and assembly
- Sanding the printed model
- painting the car body
- Various post-processing techniques
Chapter 6: testing
- Understanding and installing key RC components (Motor, servo, wheels)
- Mounting the body securely on the chassis
- Testing and calibrating your RC car for performance
Project Steps
1. Generating the 3D Model
Objective: Create an initial 3D car model using AI tools.
Content: 1. Learn and practice AI prompts and generate a blank car model using ChatGPT 2. Use Tripo AI to generate a 3D model: - Upload your reference image - Adjust generation parameters as needed - Download the generated 3D model
Generate car image using ChatGPT
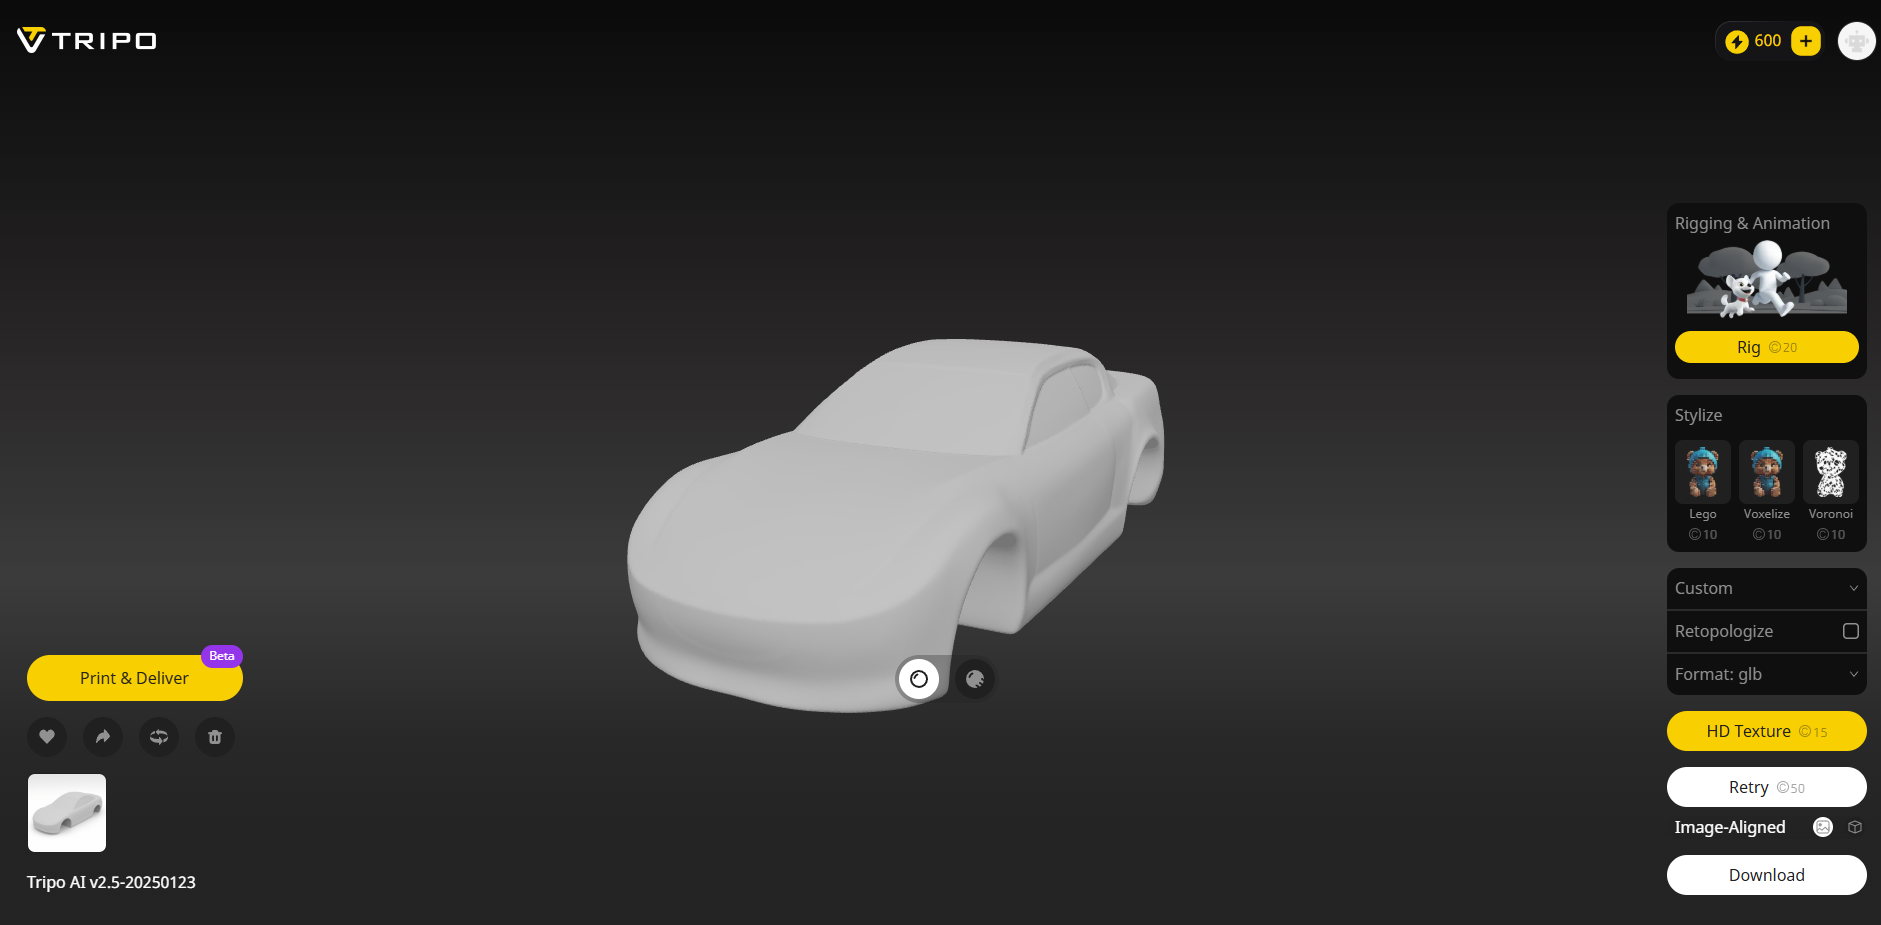
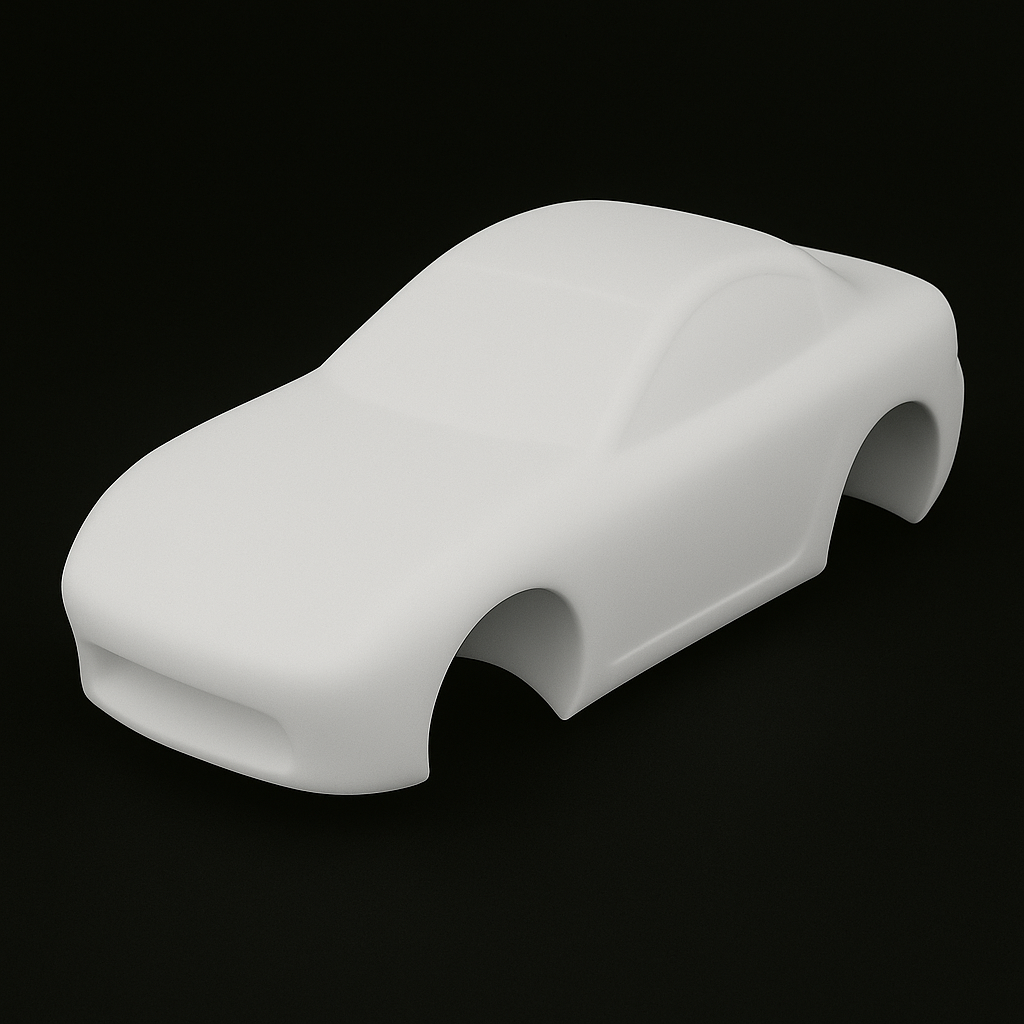 Use the image to generate a car 3D model using Tripo AI
2. Model Modification
Objective: Customize the car model's appearance.
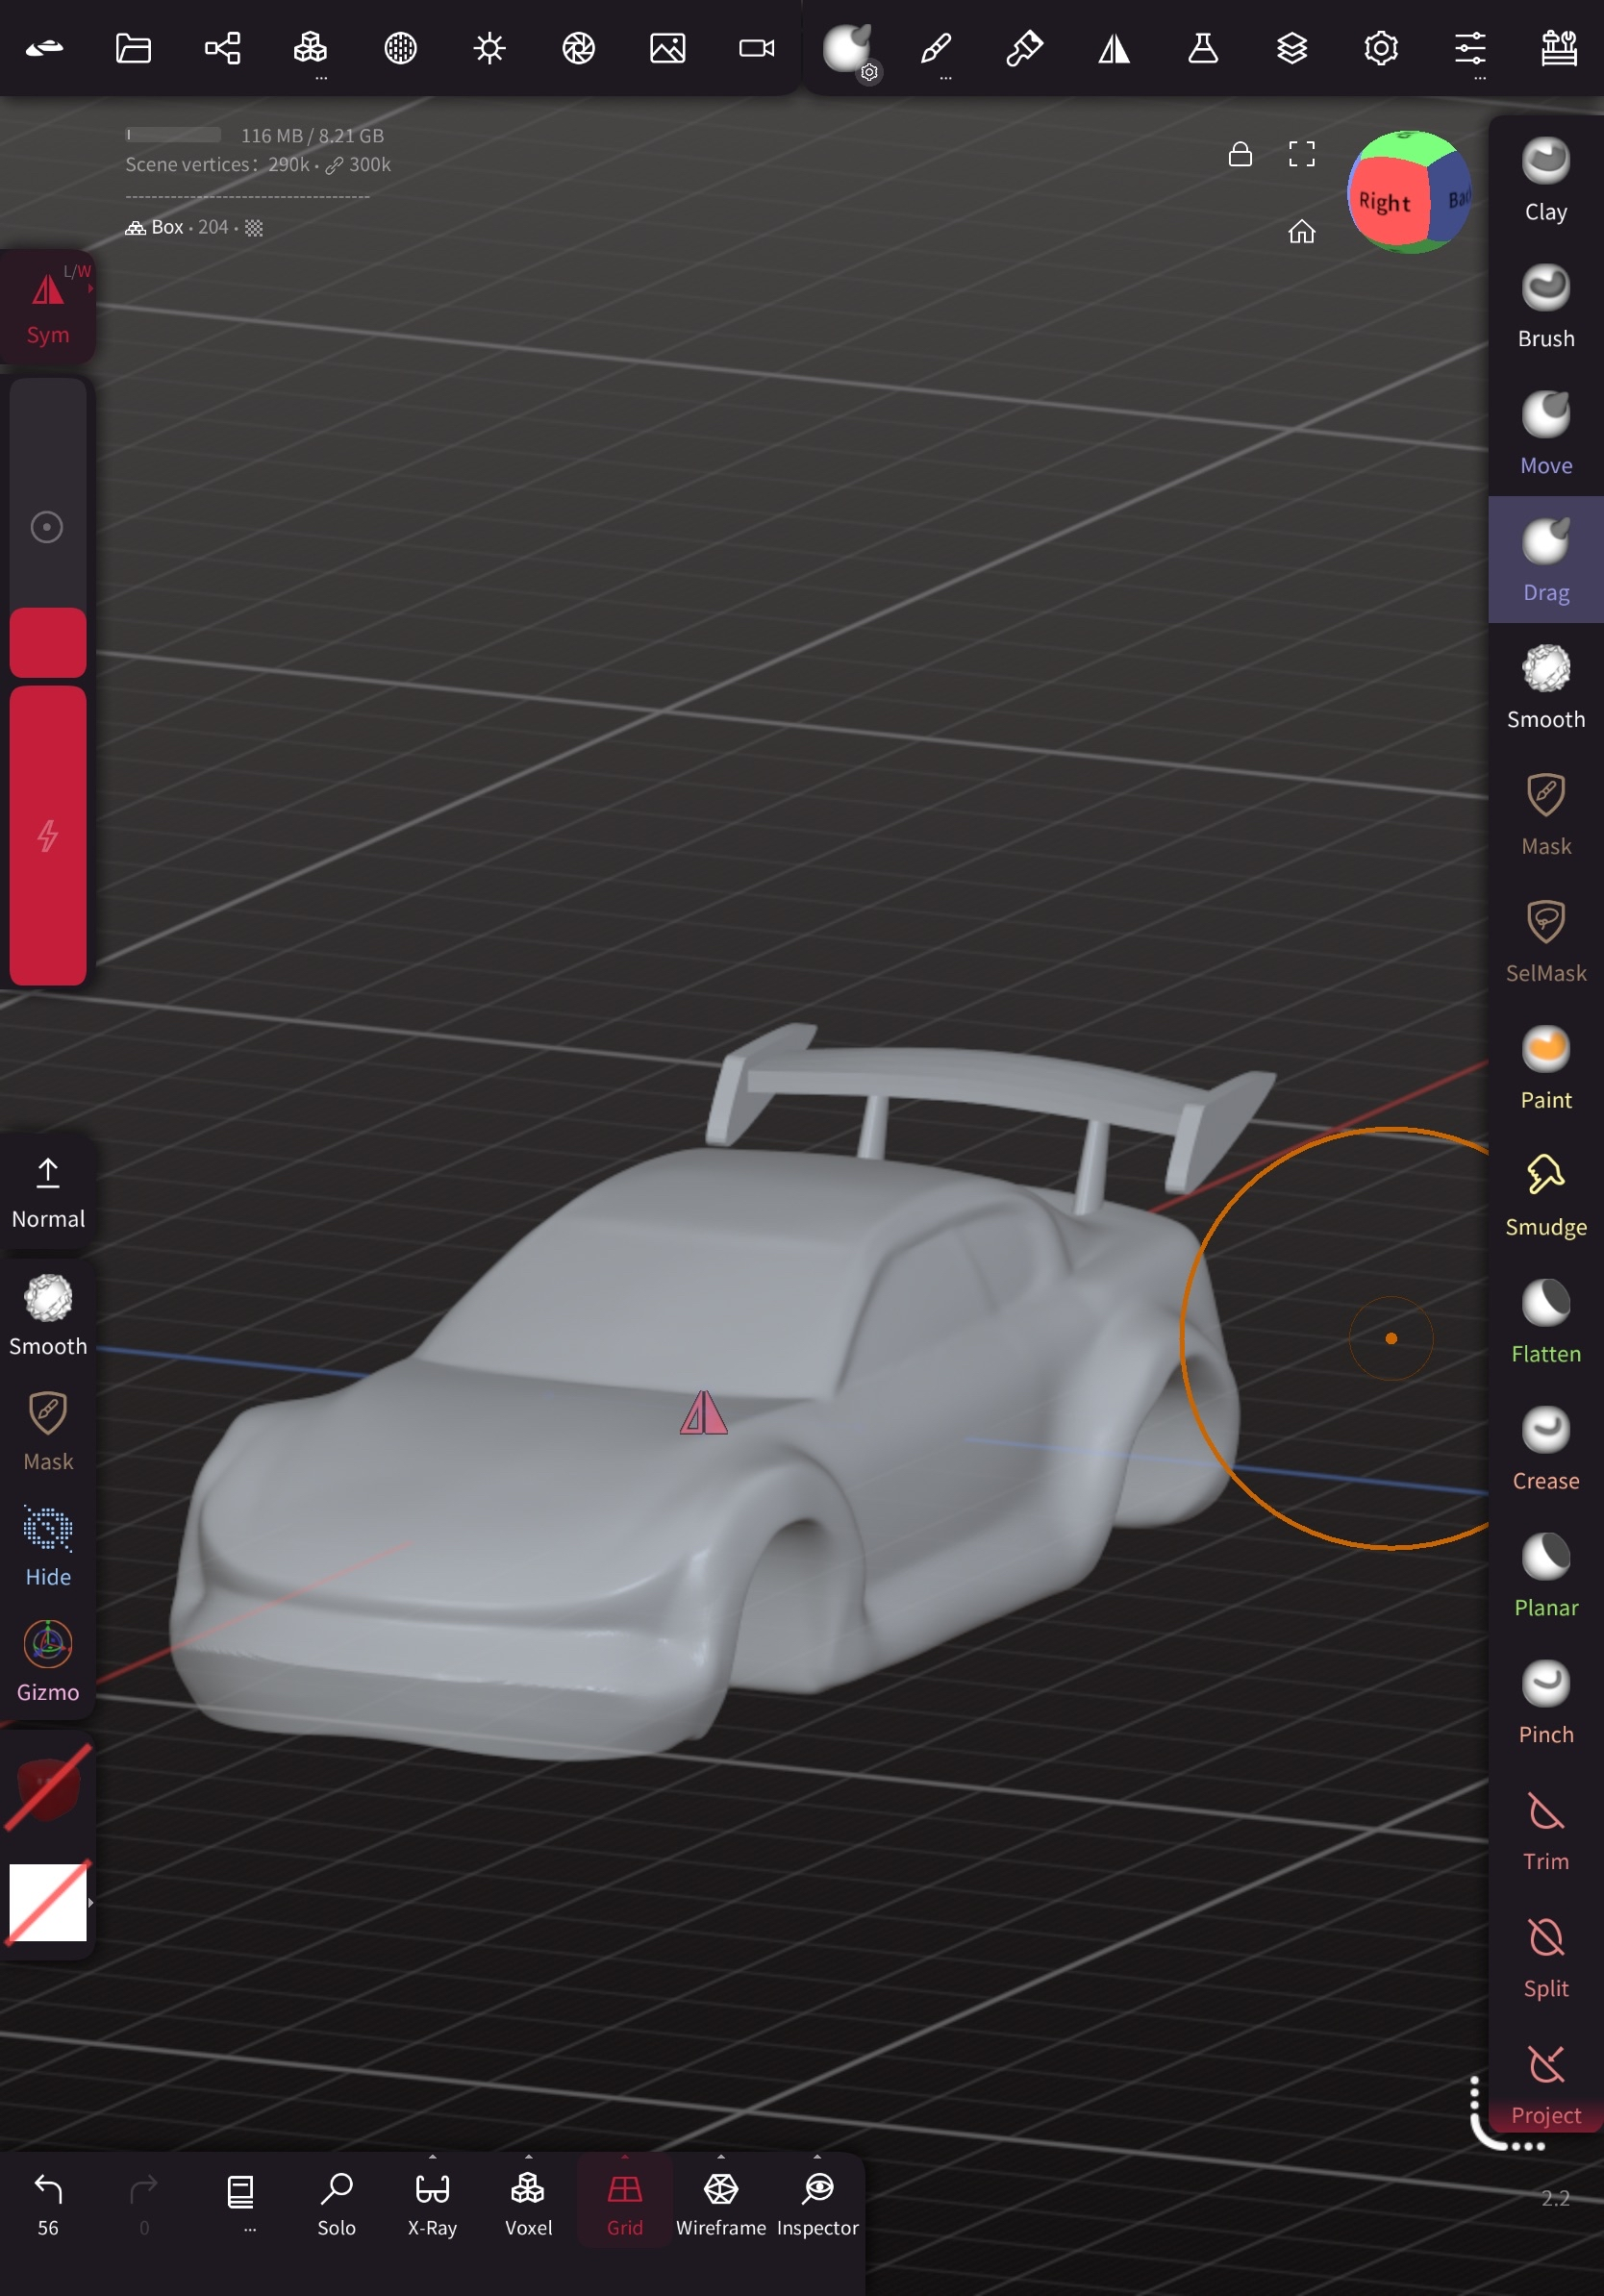
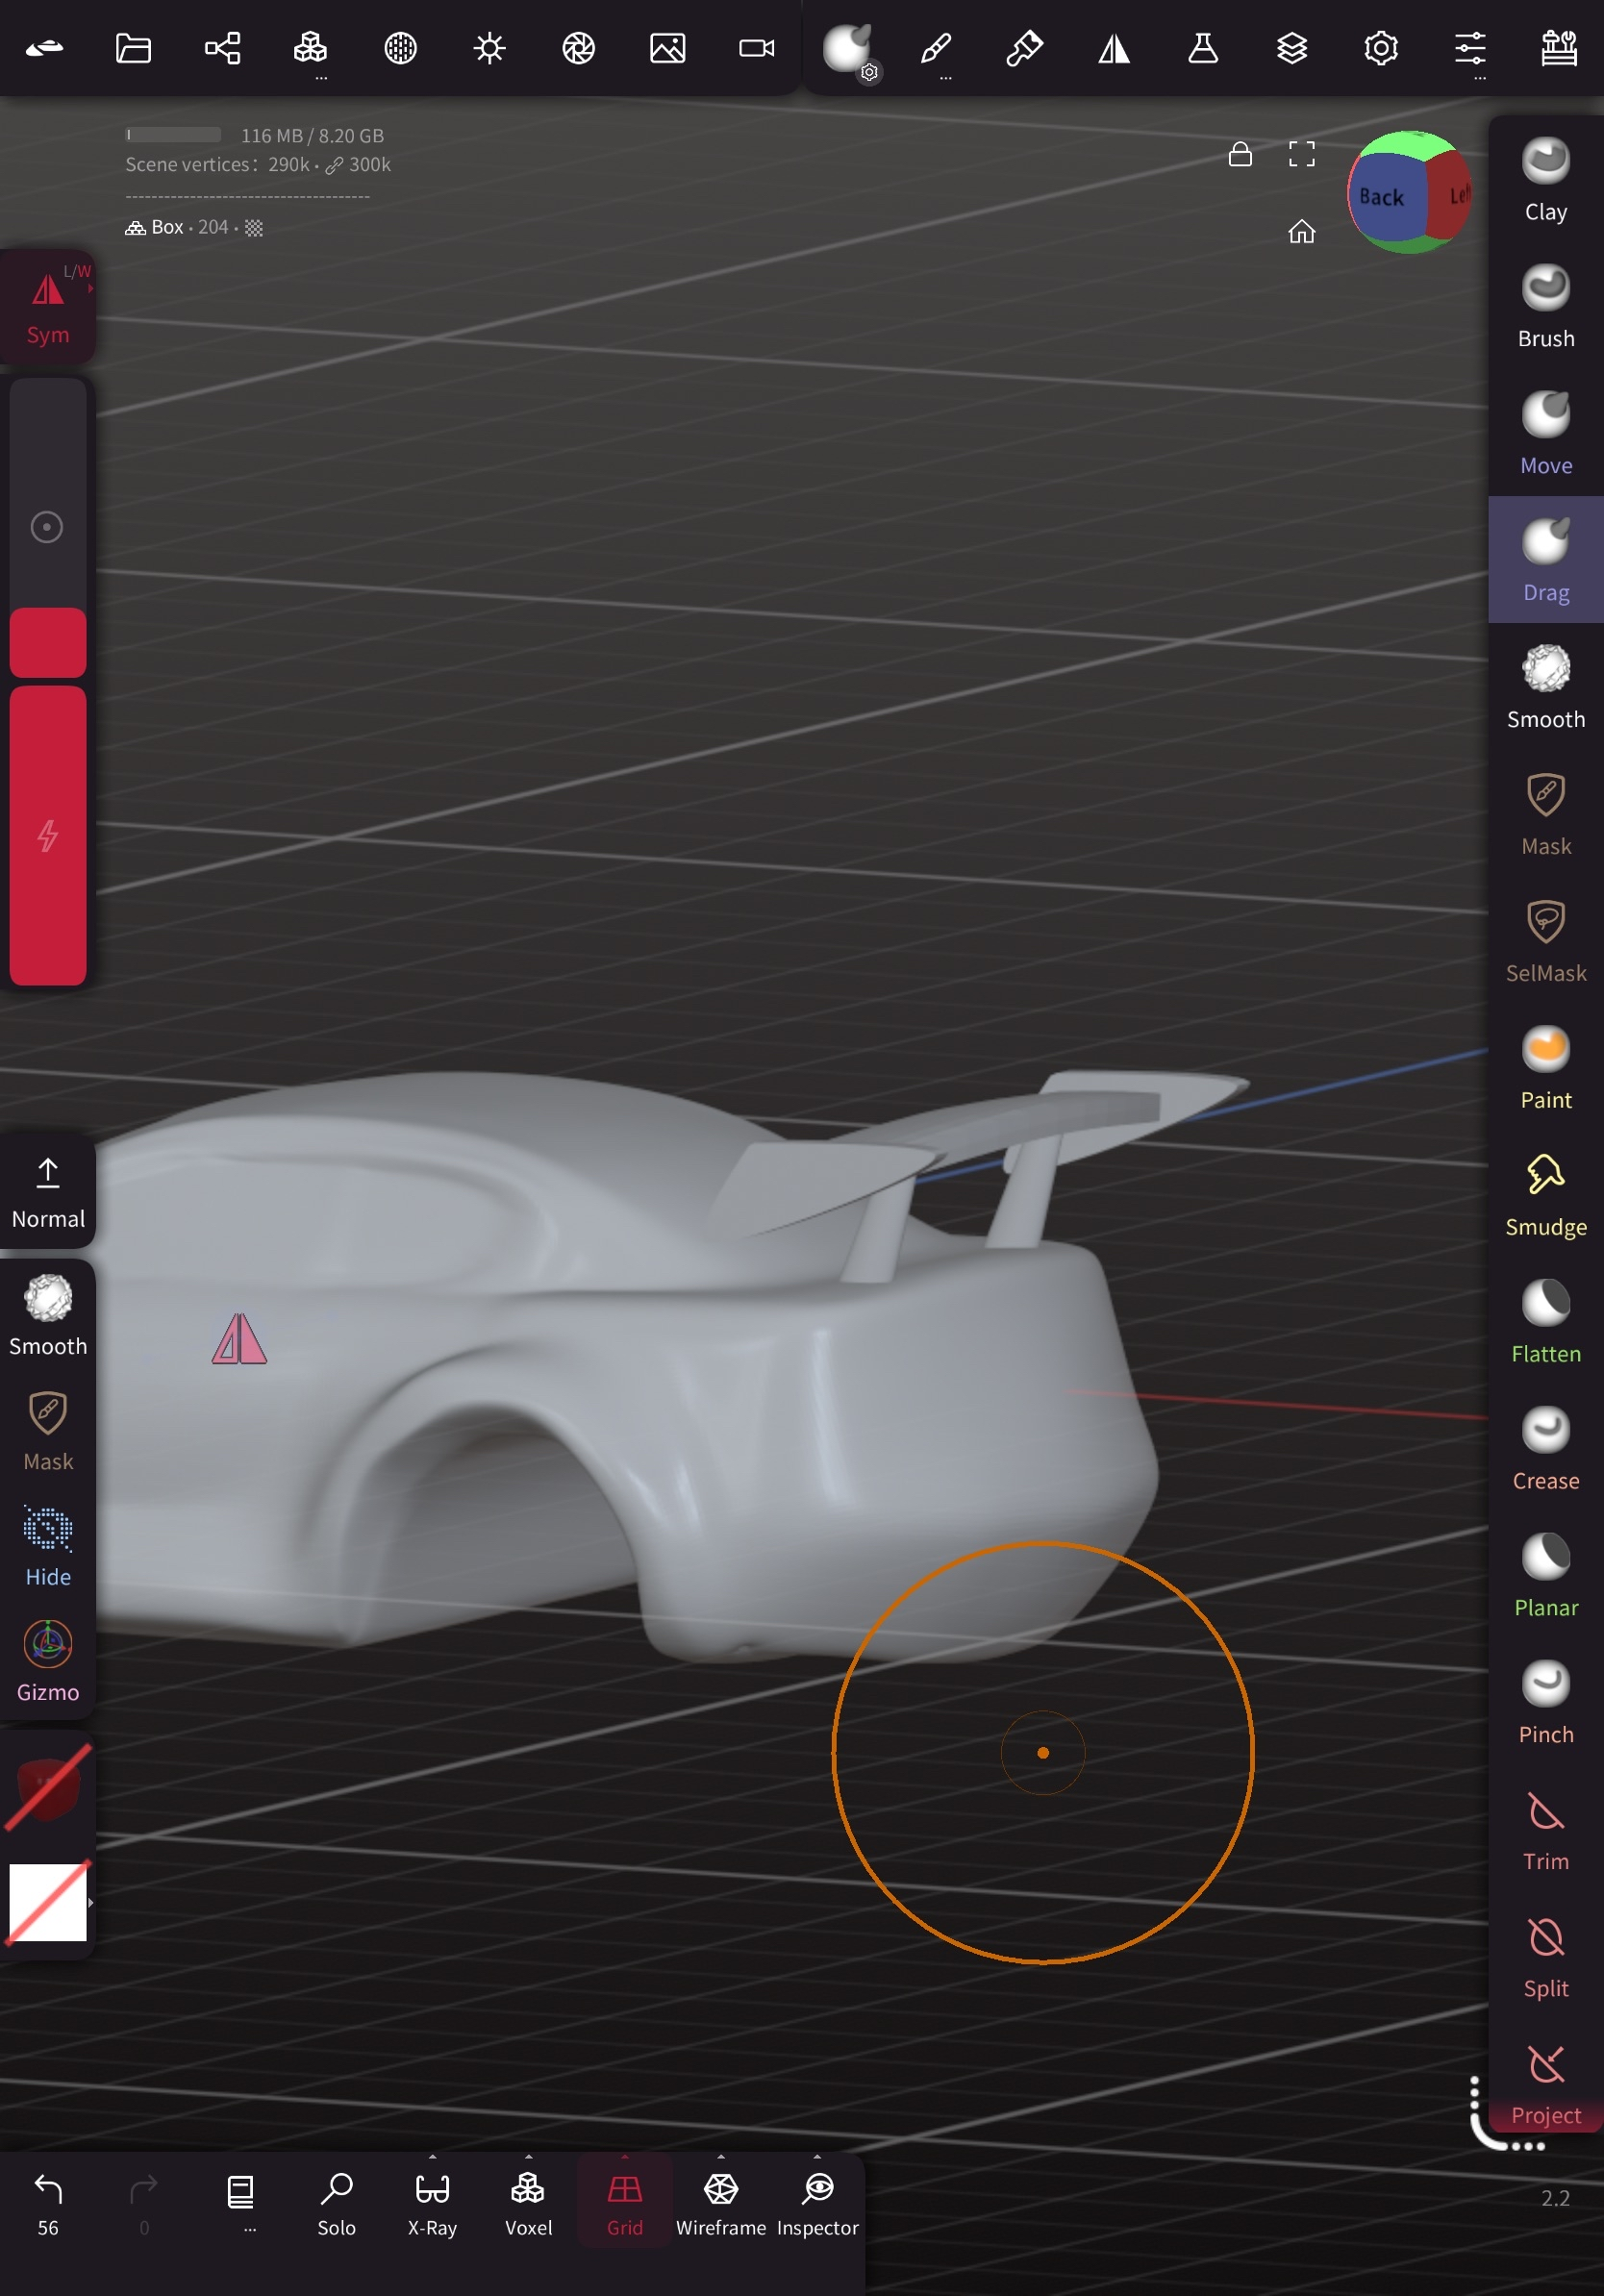
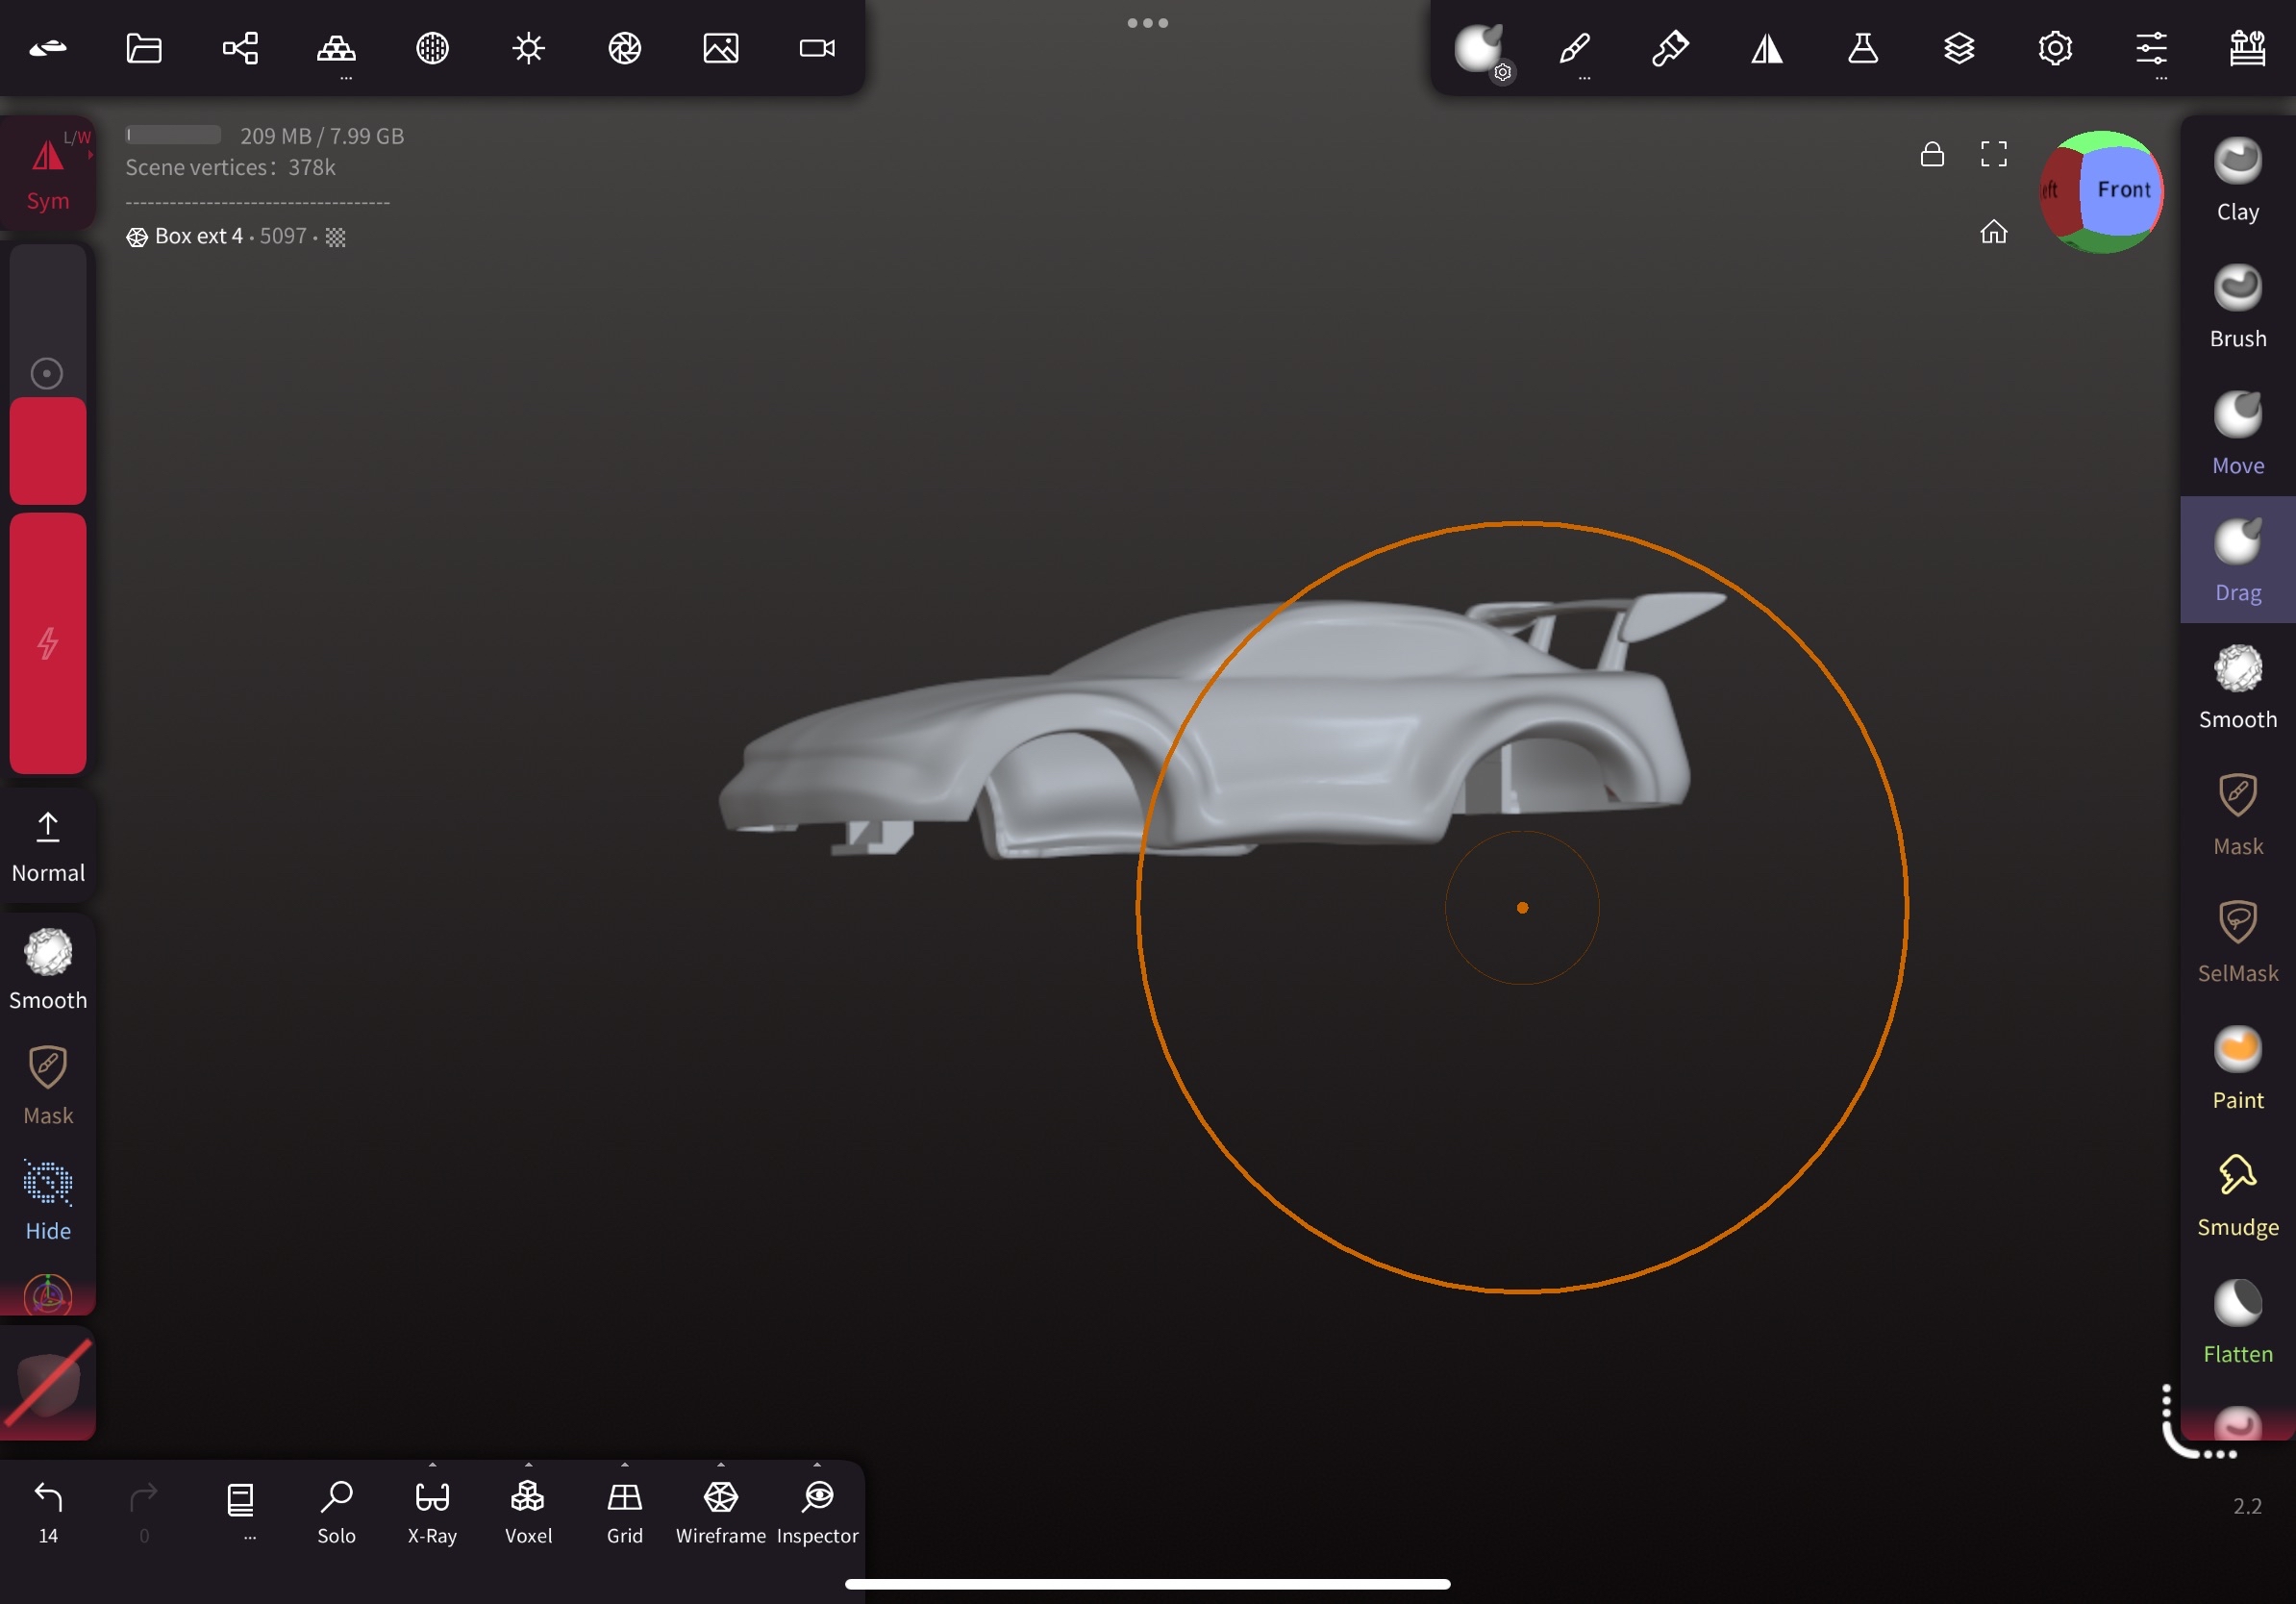
Content: 1. Import the generated model into Nomad Sculpt 2. Remesh the model(Preferrably Quad Remesh Tool) 3. Learn about basic car customisation options 4. Use basic modification tools: - Masking tool for maintaining certain parts - Move and Drag tool for reshaping windshield and overall shape - Clay for skirts, fender and smooth it - Clay, move and smooth for front bumper and rear bumper - Use Primitives and trim tool for spoilers - Smooth tool for evening out rough spots
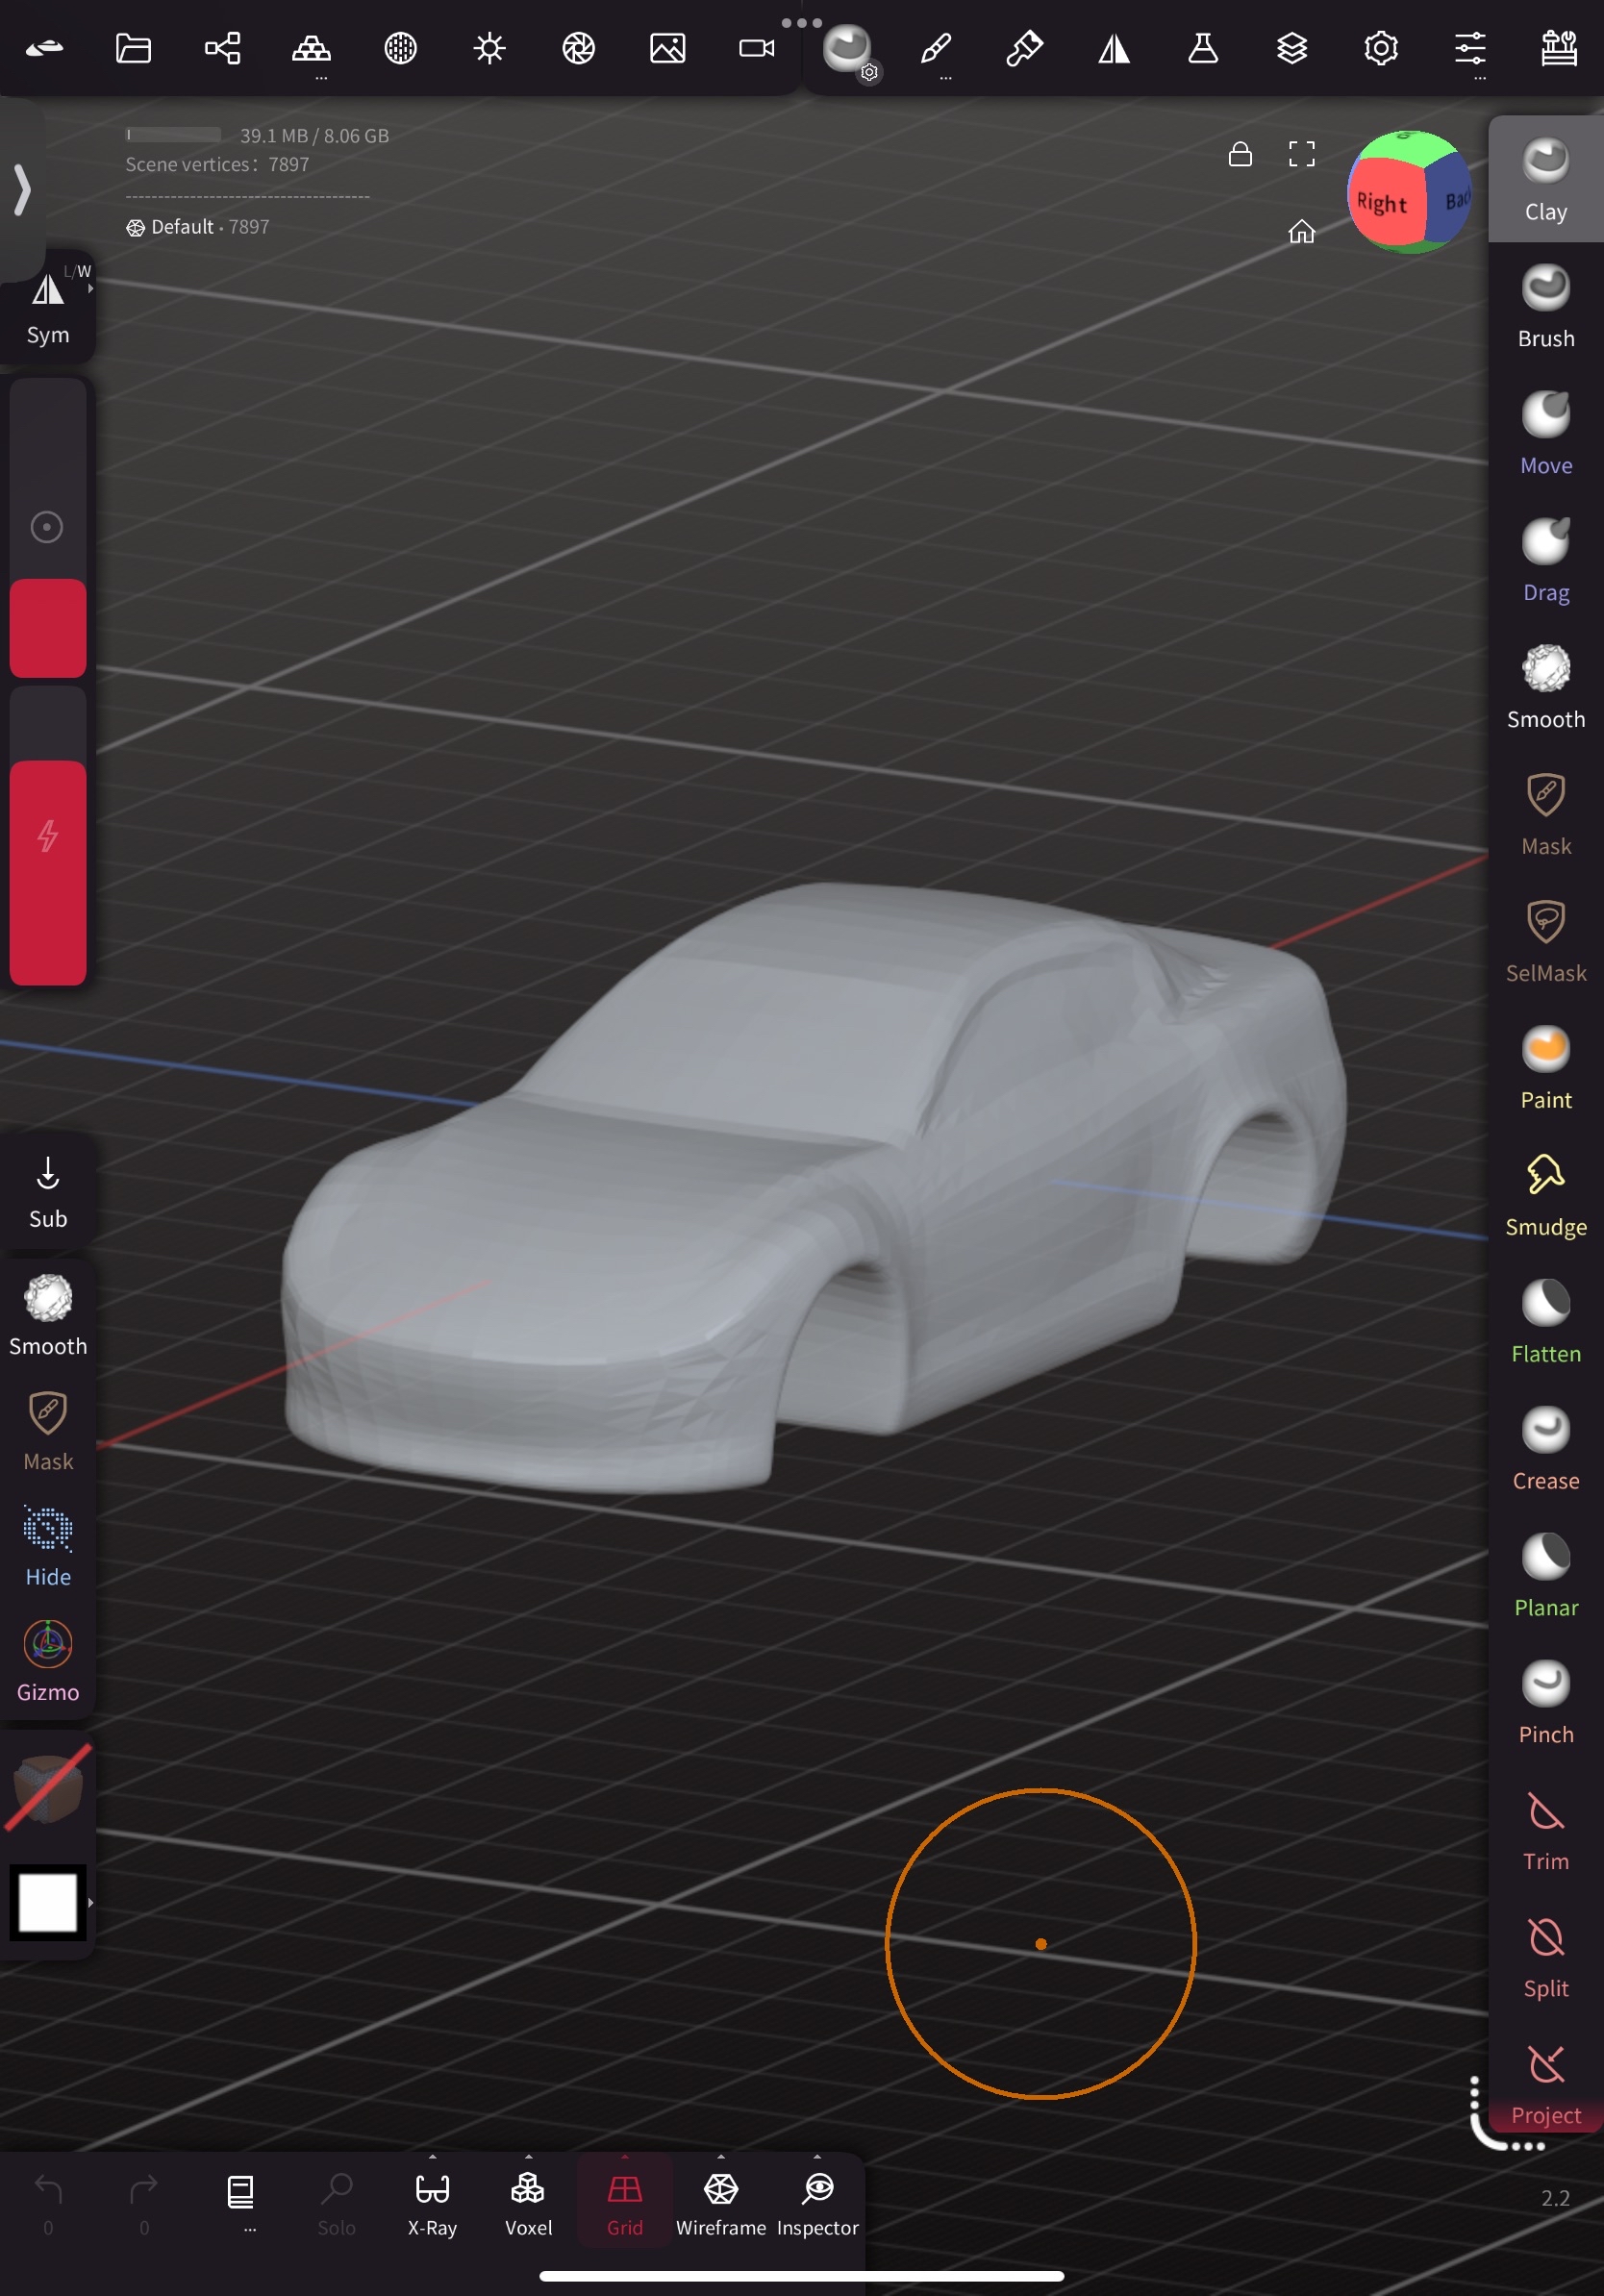
Car model in Nomad before directly imported from Tripo AI
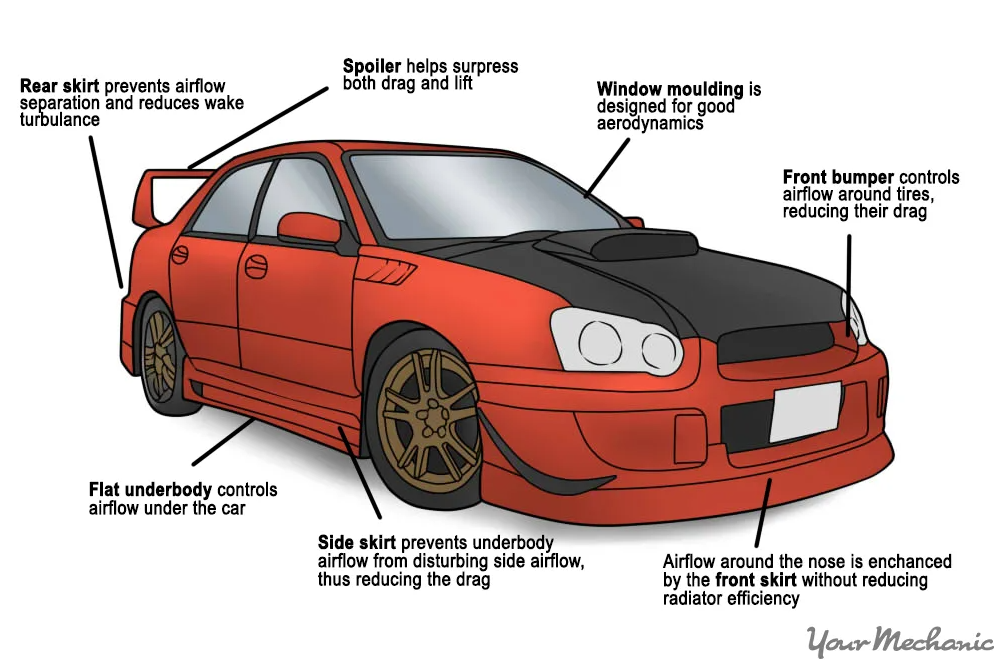
 Reference for what car parts can be customised
Example of car model after modification

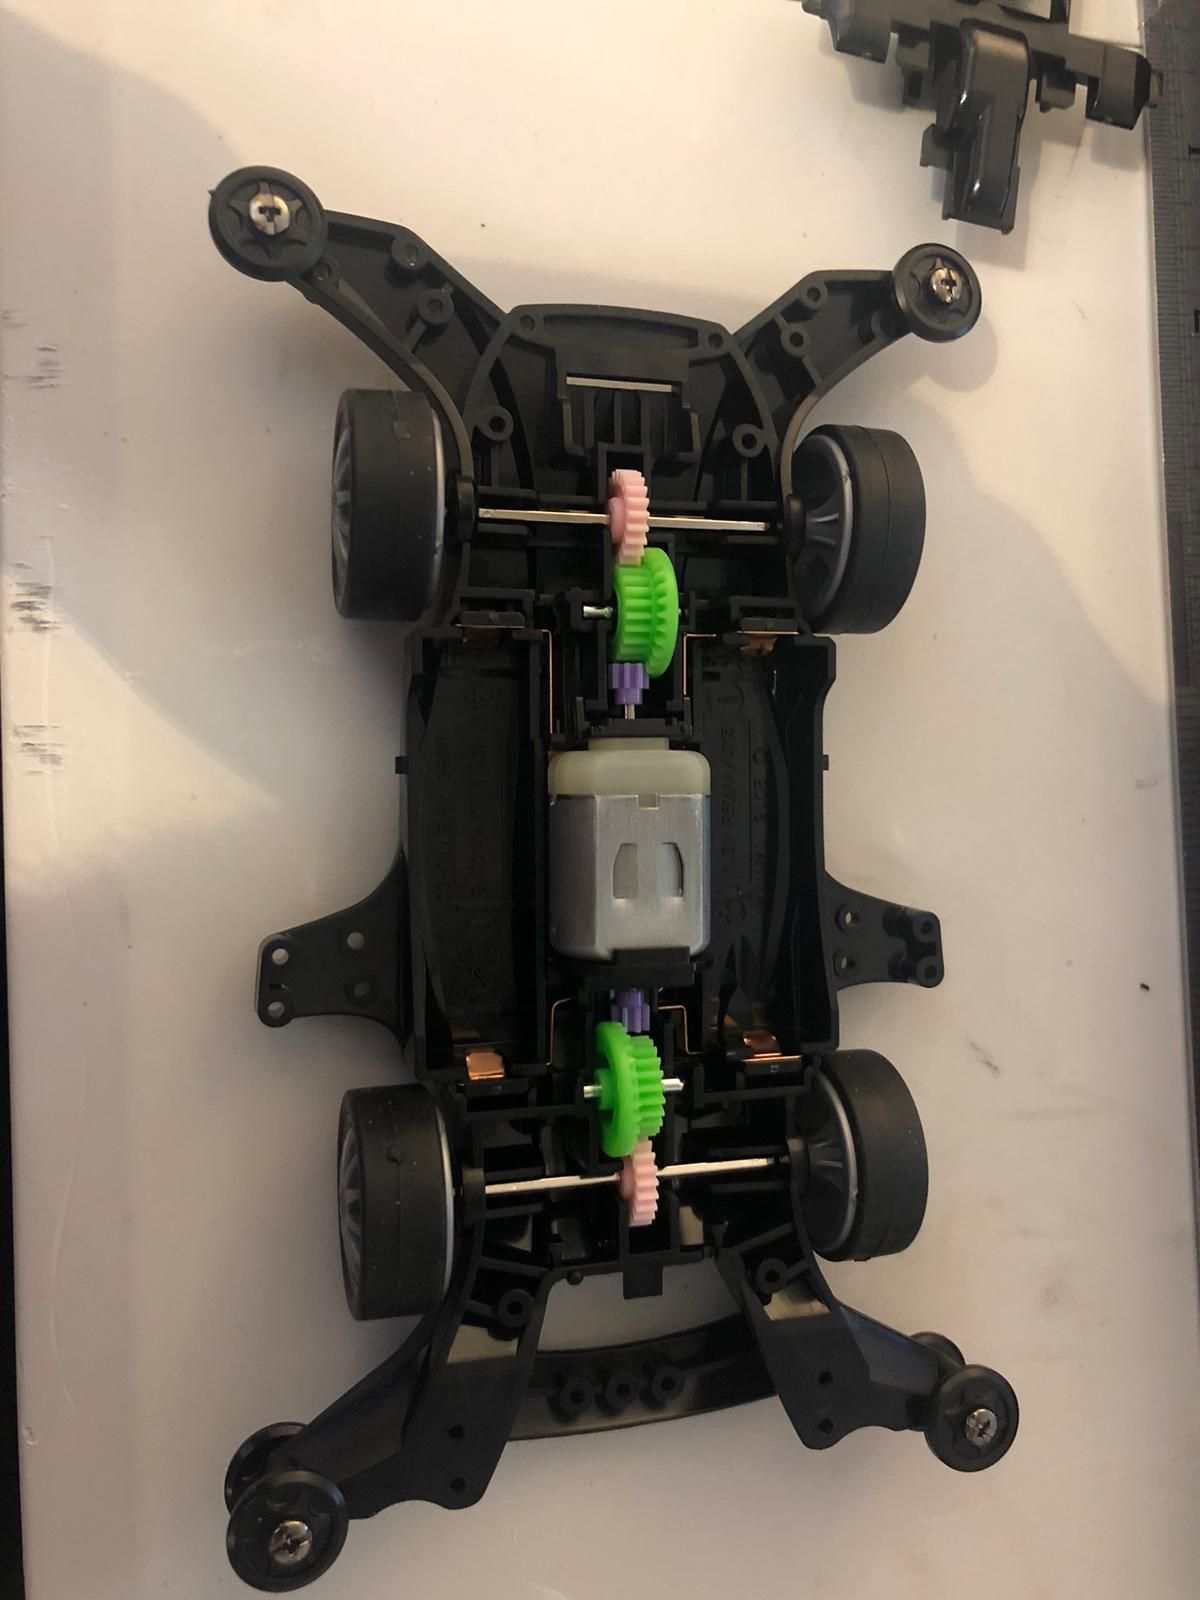
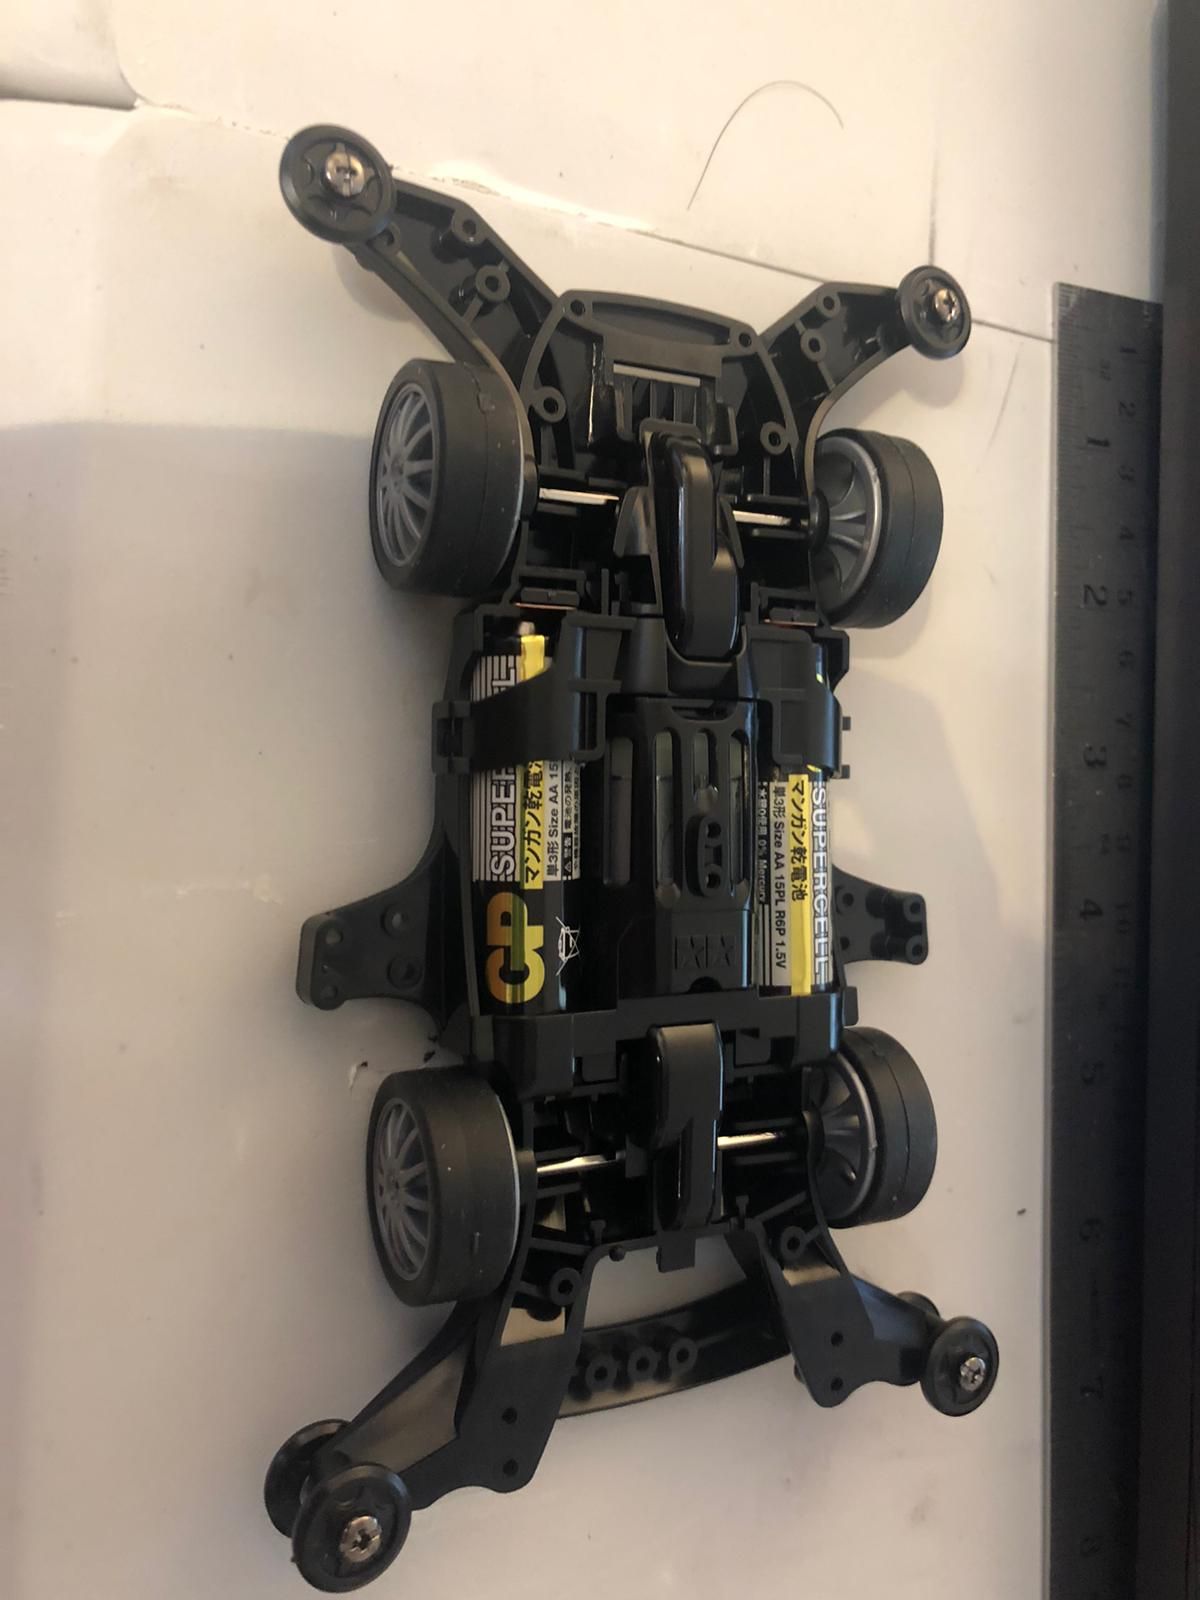
- Assemble a Tamiya 4WD chassis and learn how the vehicle works and how it is assembled.
- Shell the car cover
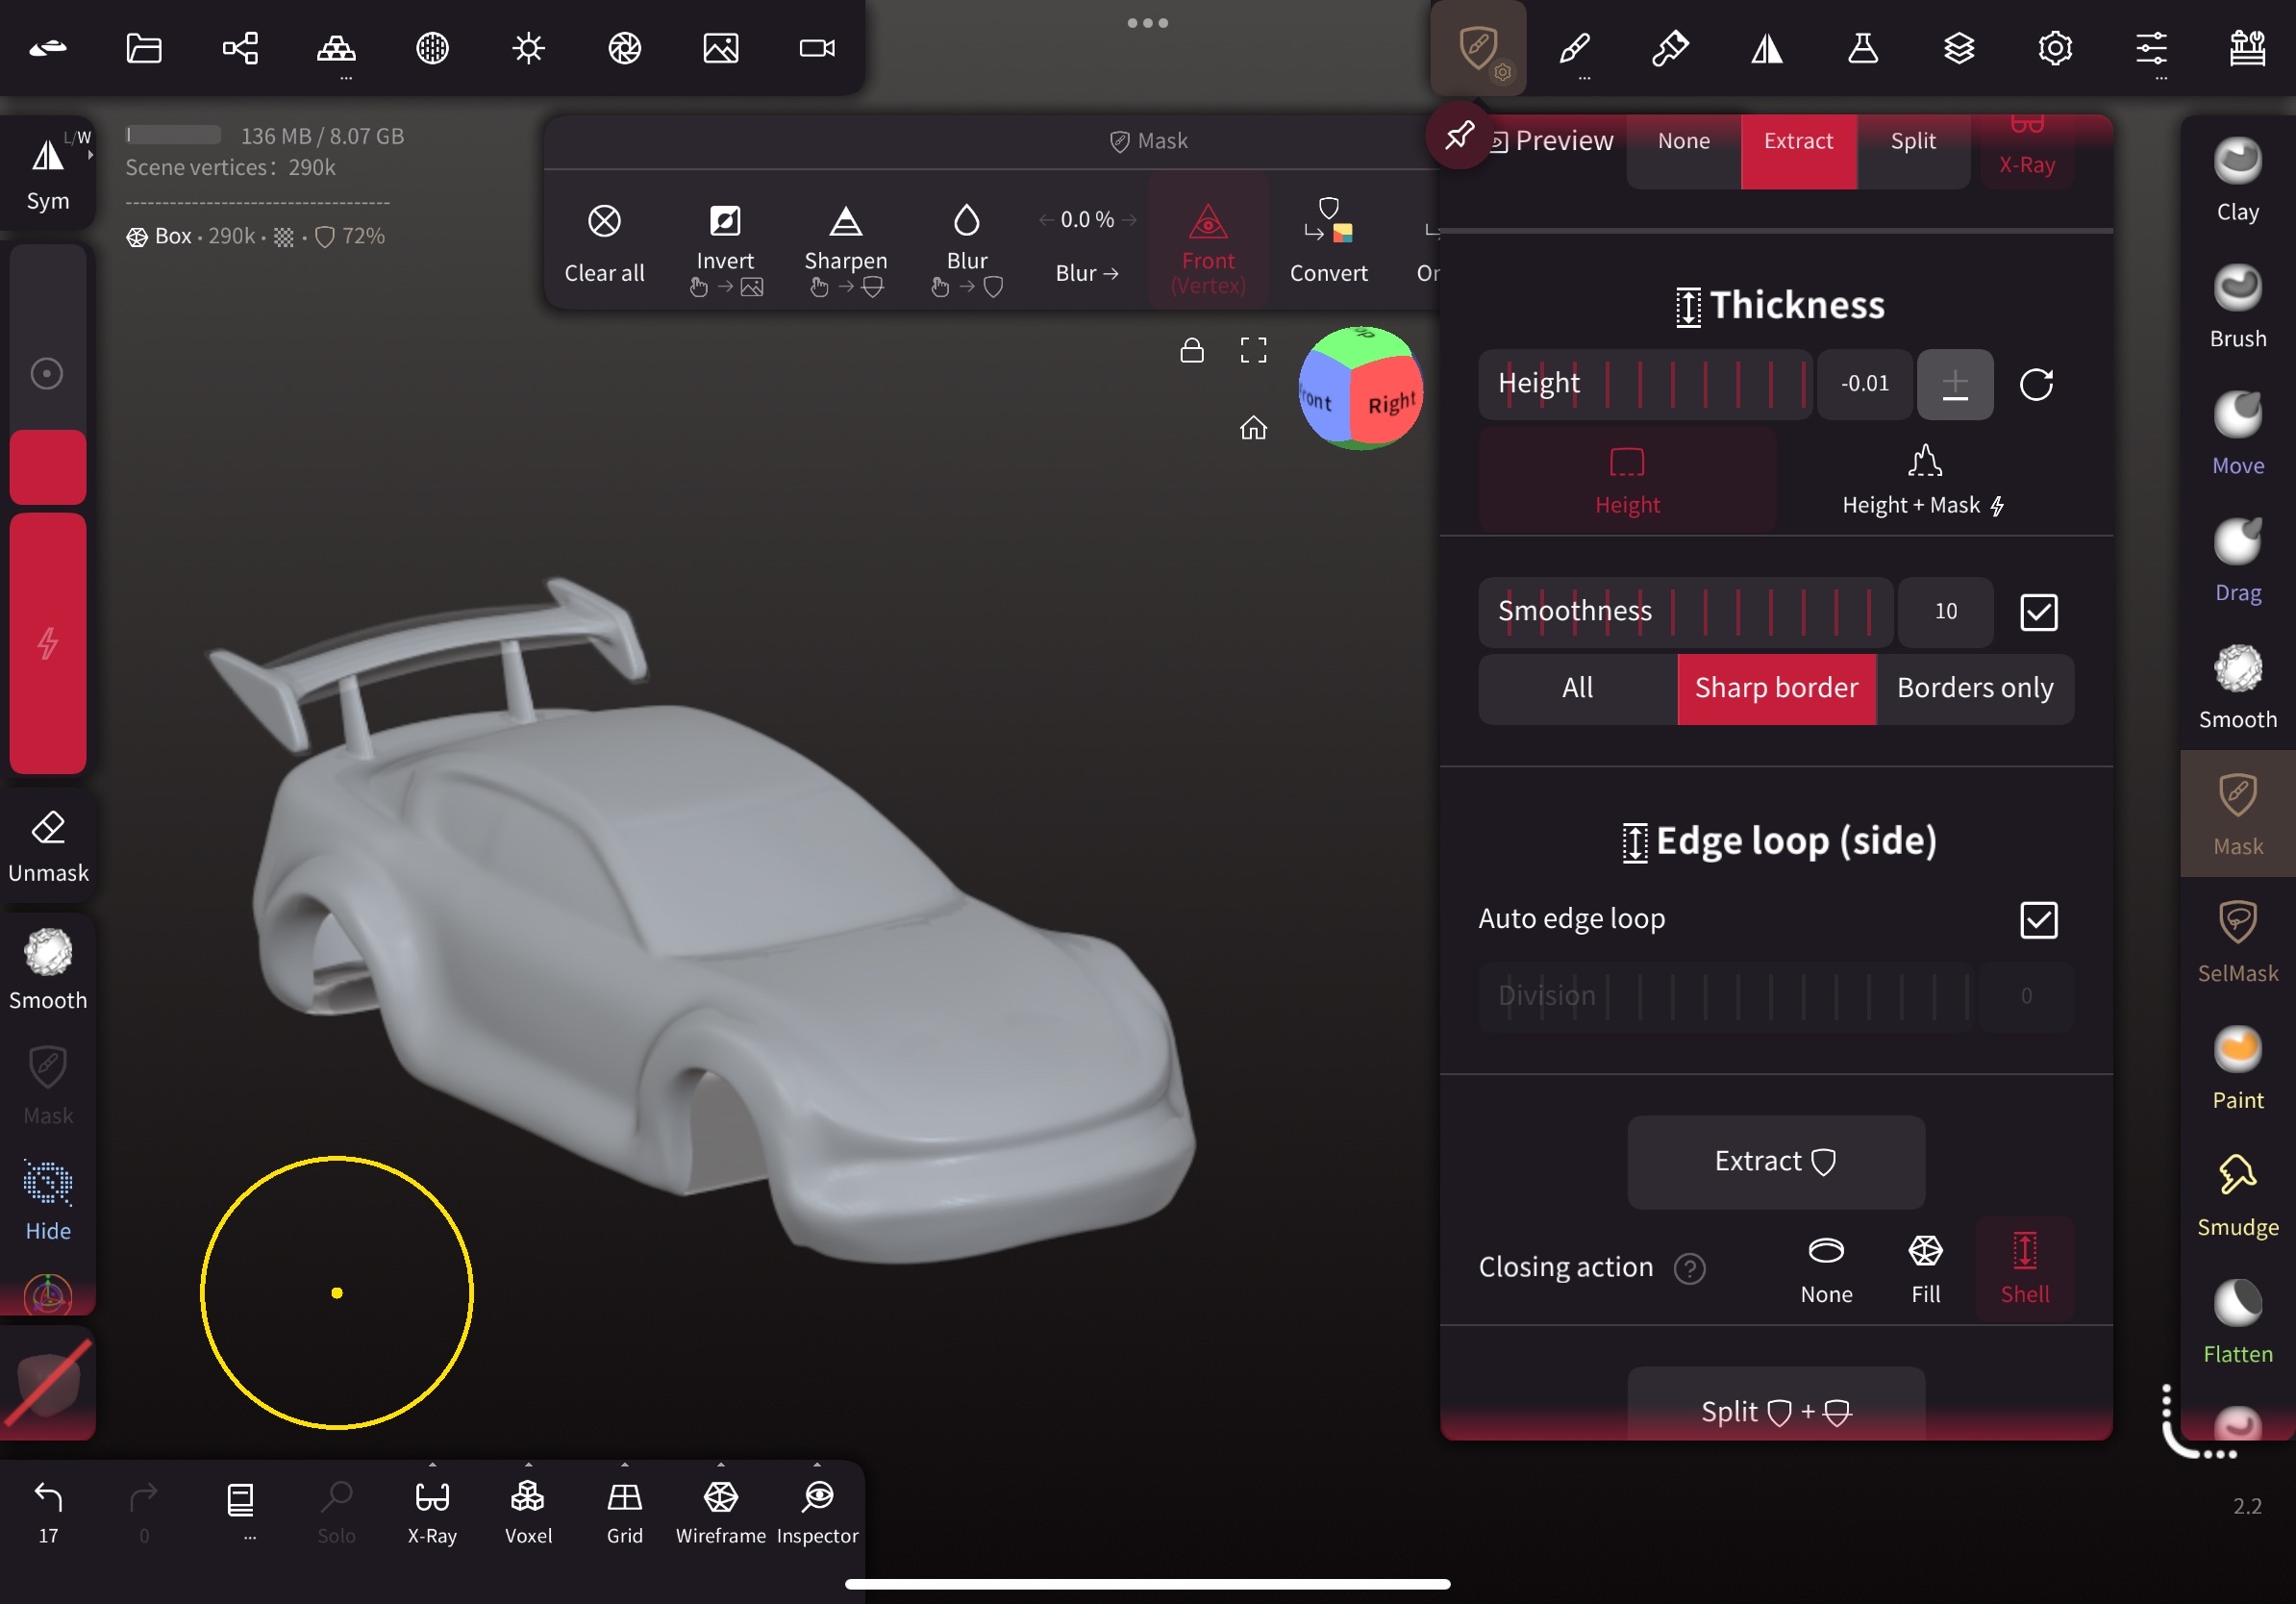
Boolean all the parts and mask outer surface of the car
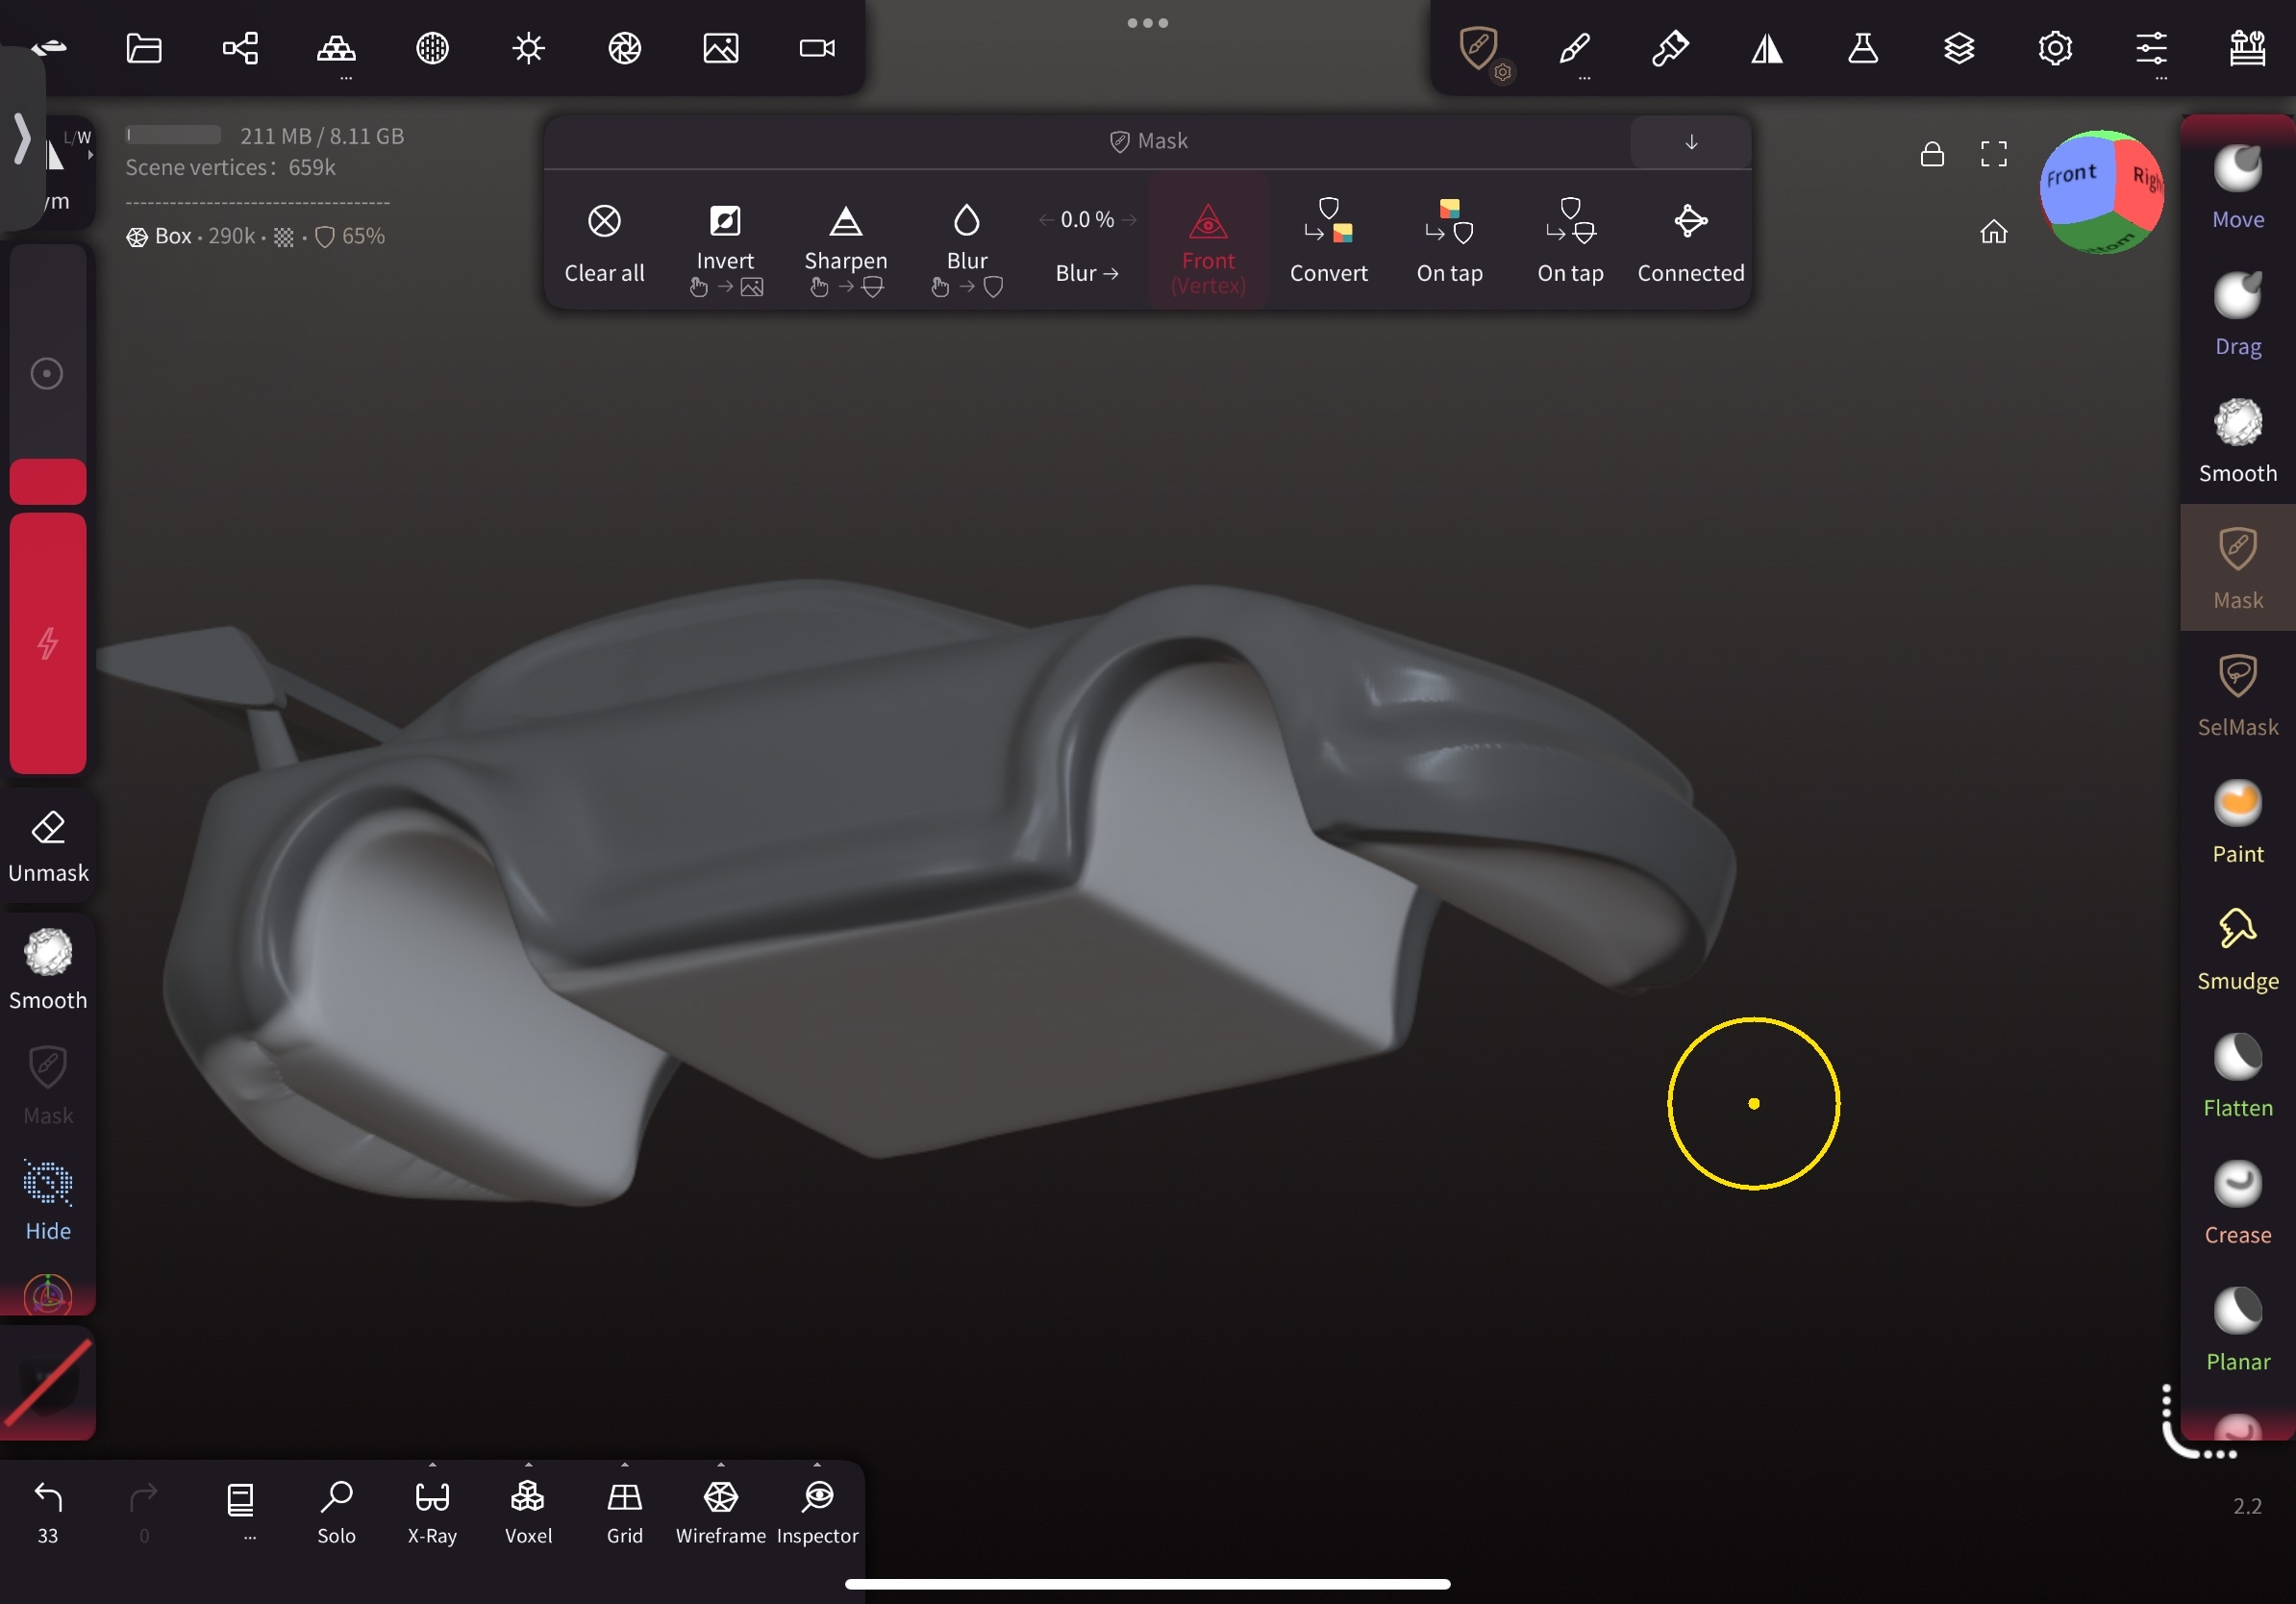
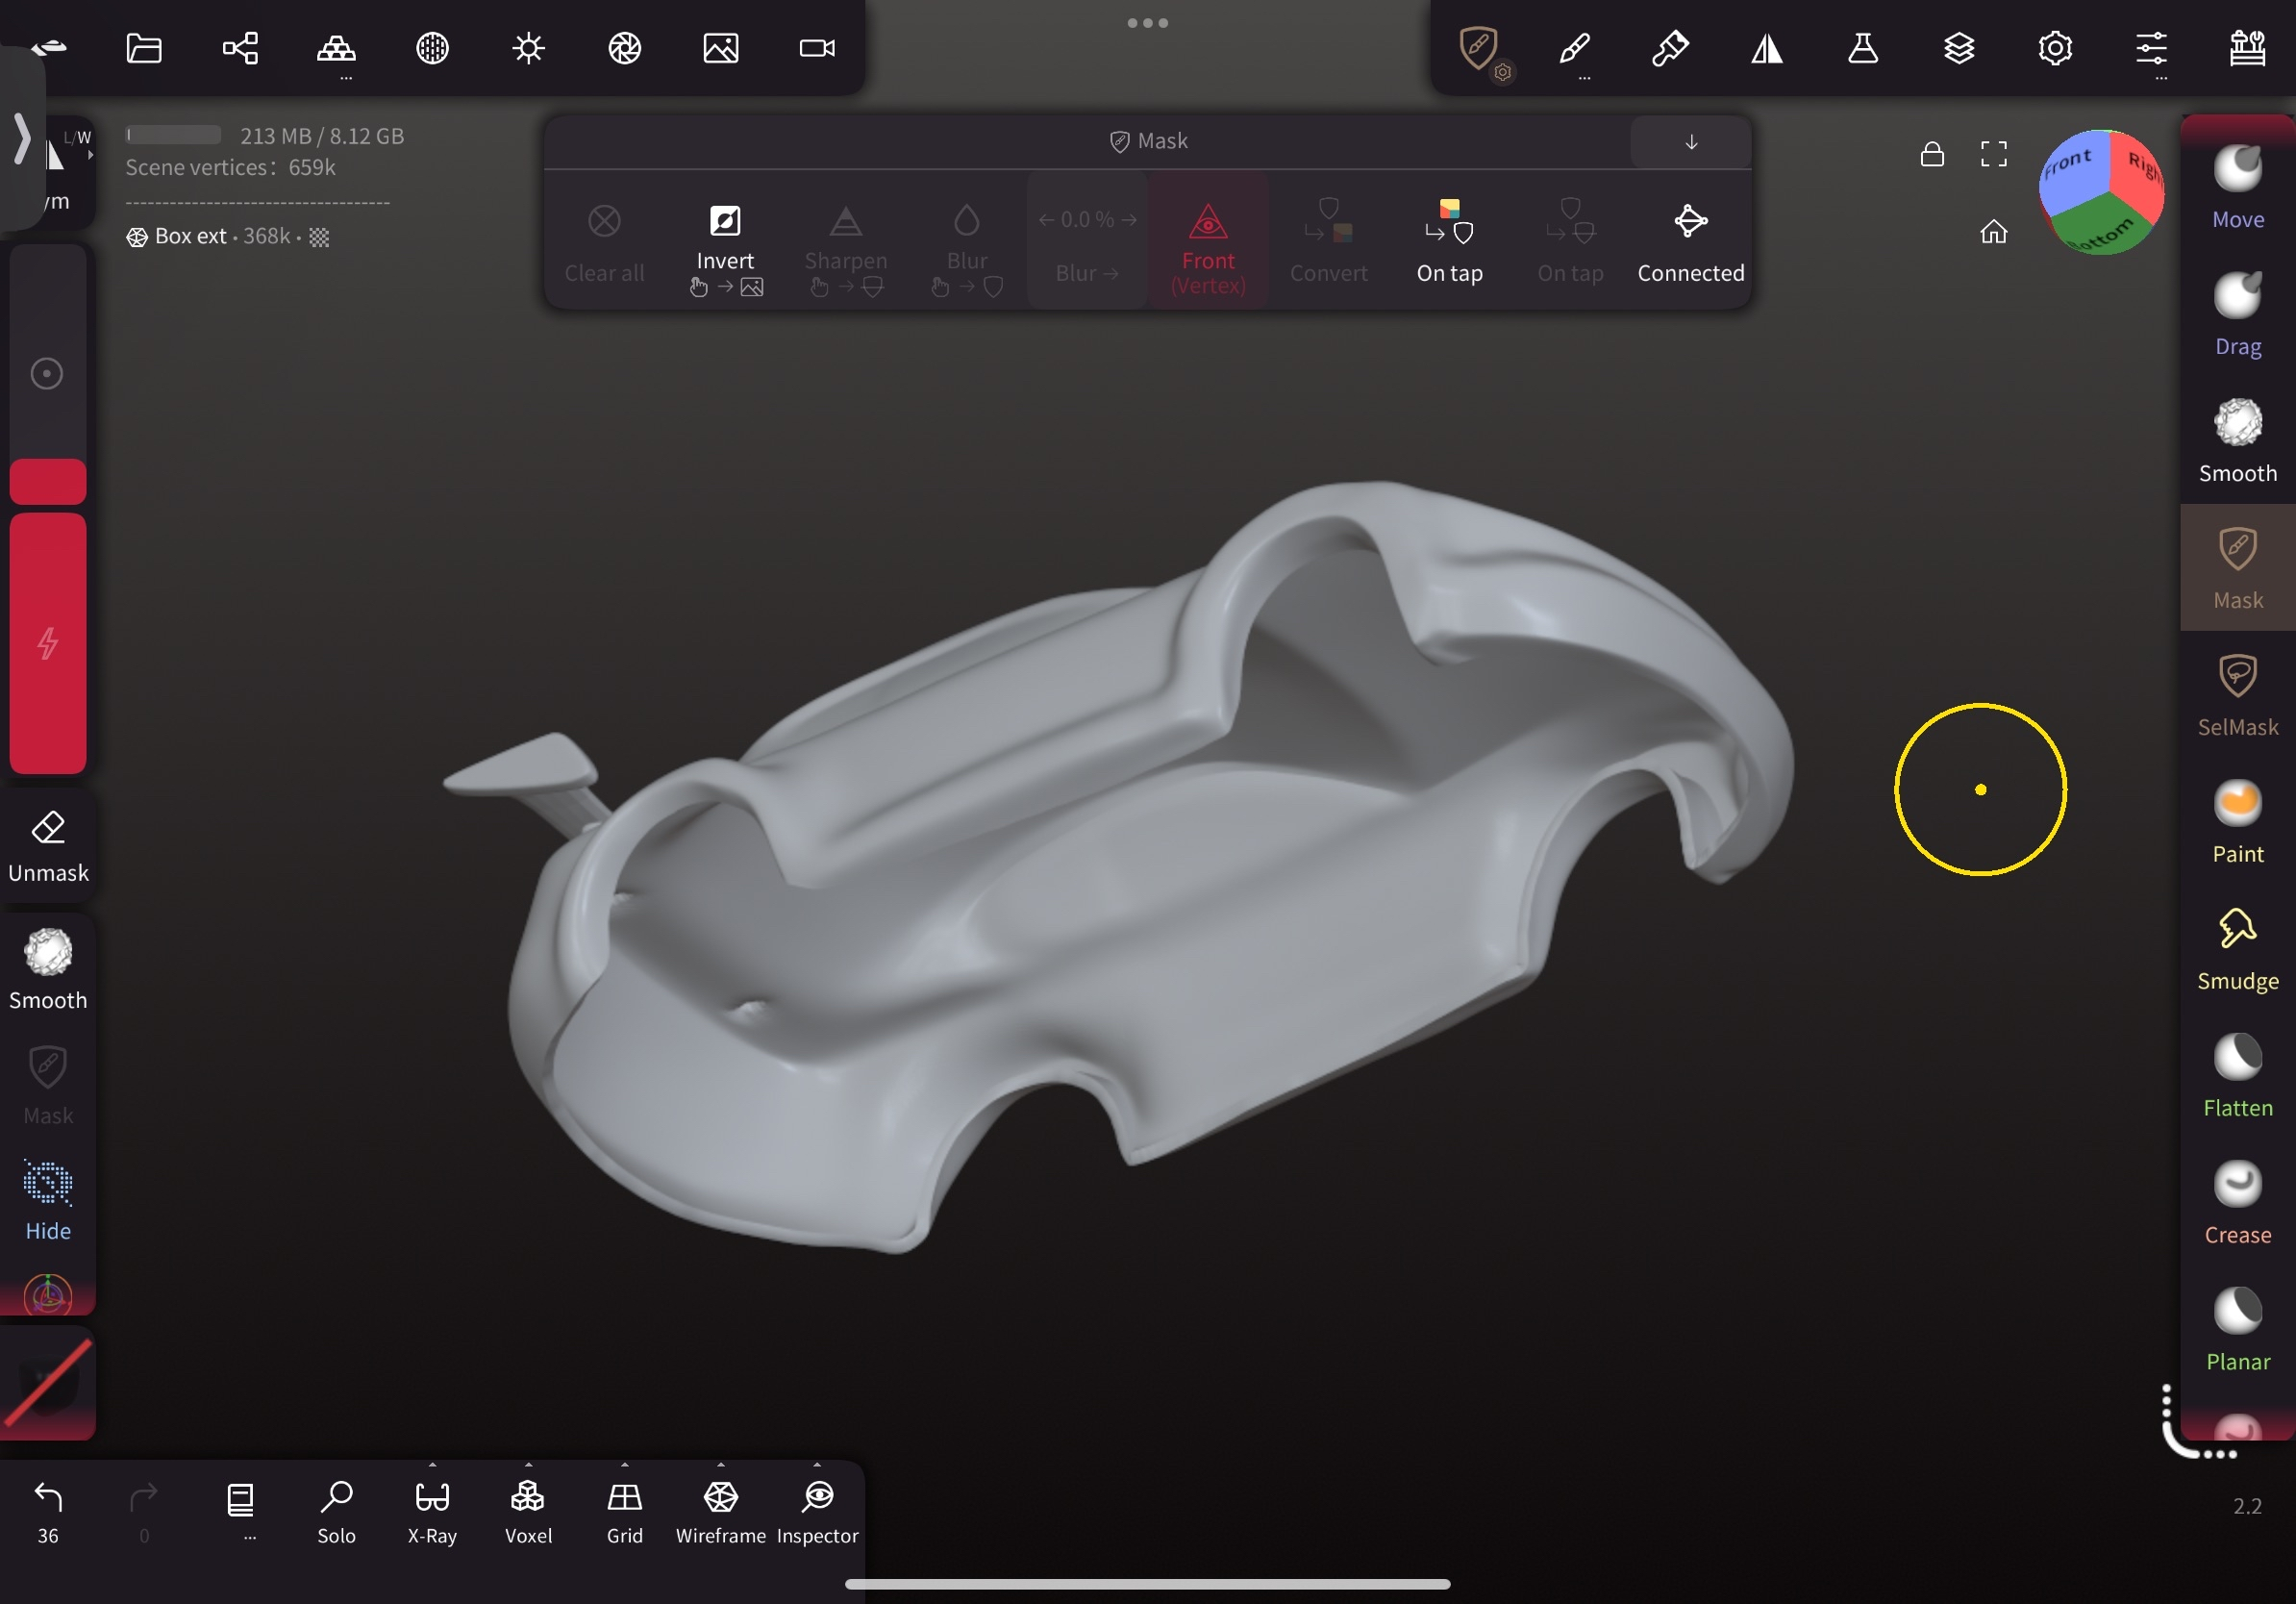
Use extract with 0.01 shell thickness to create the car shell.
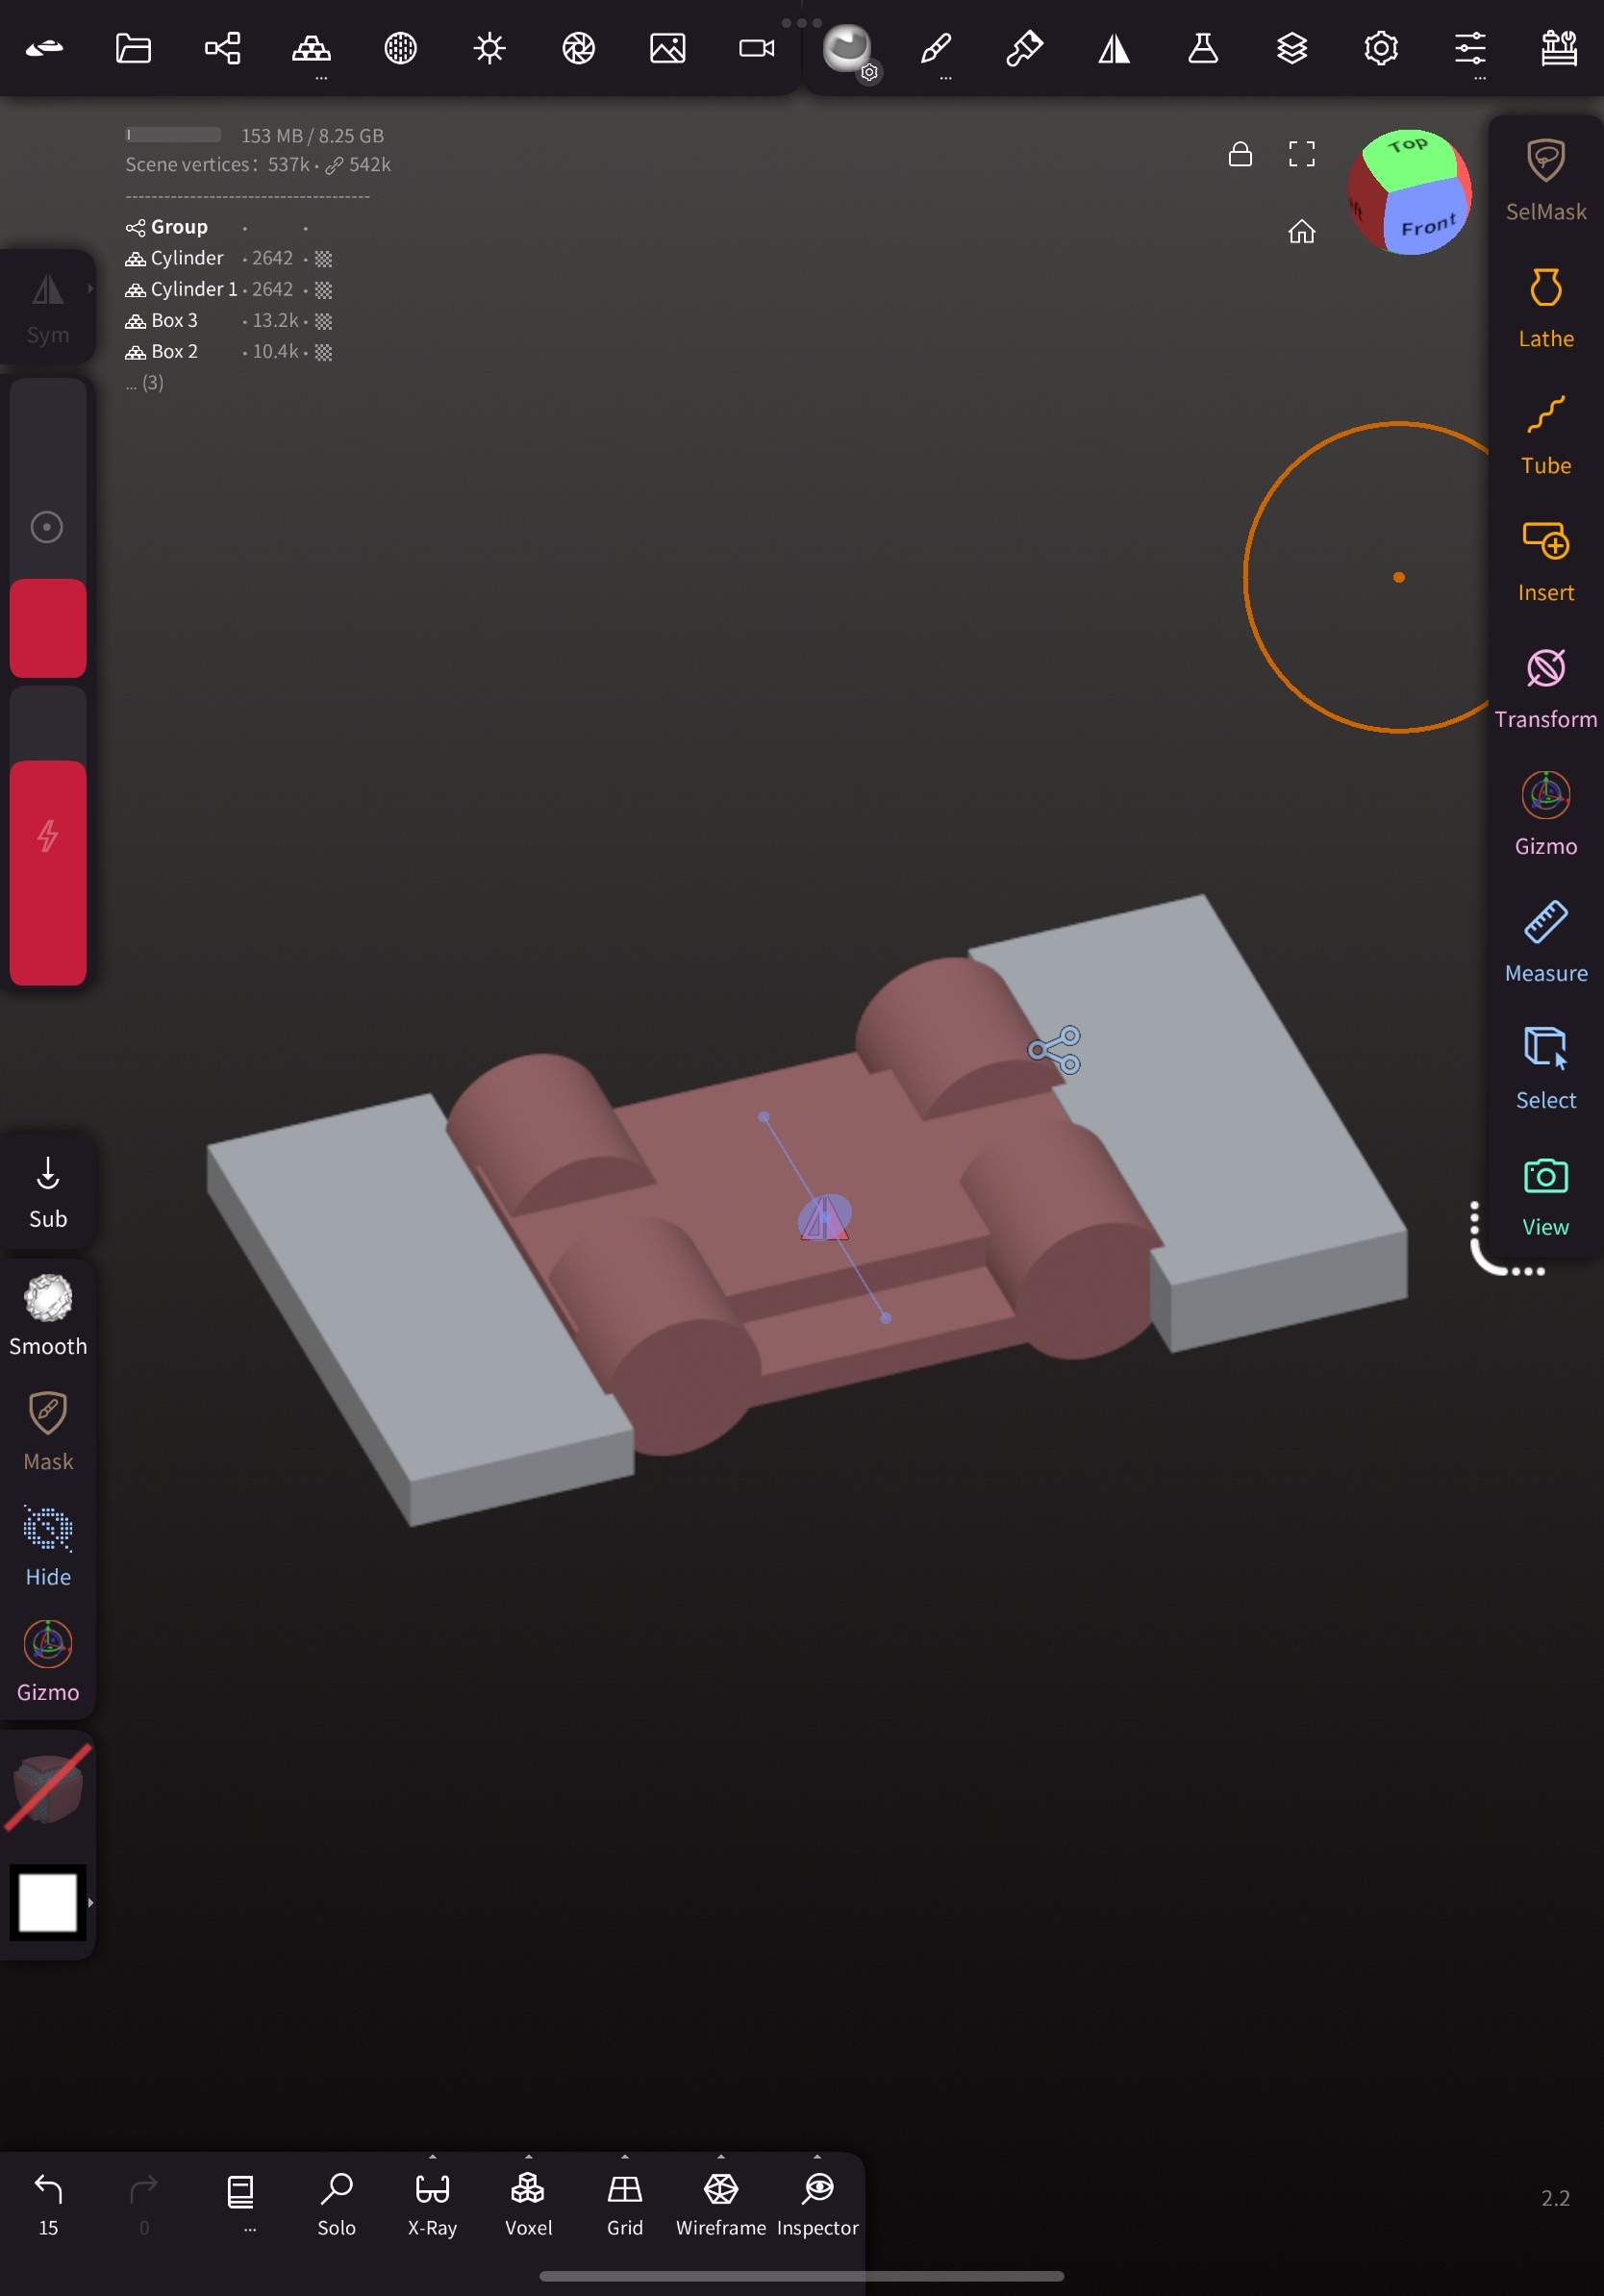
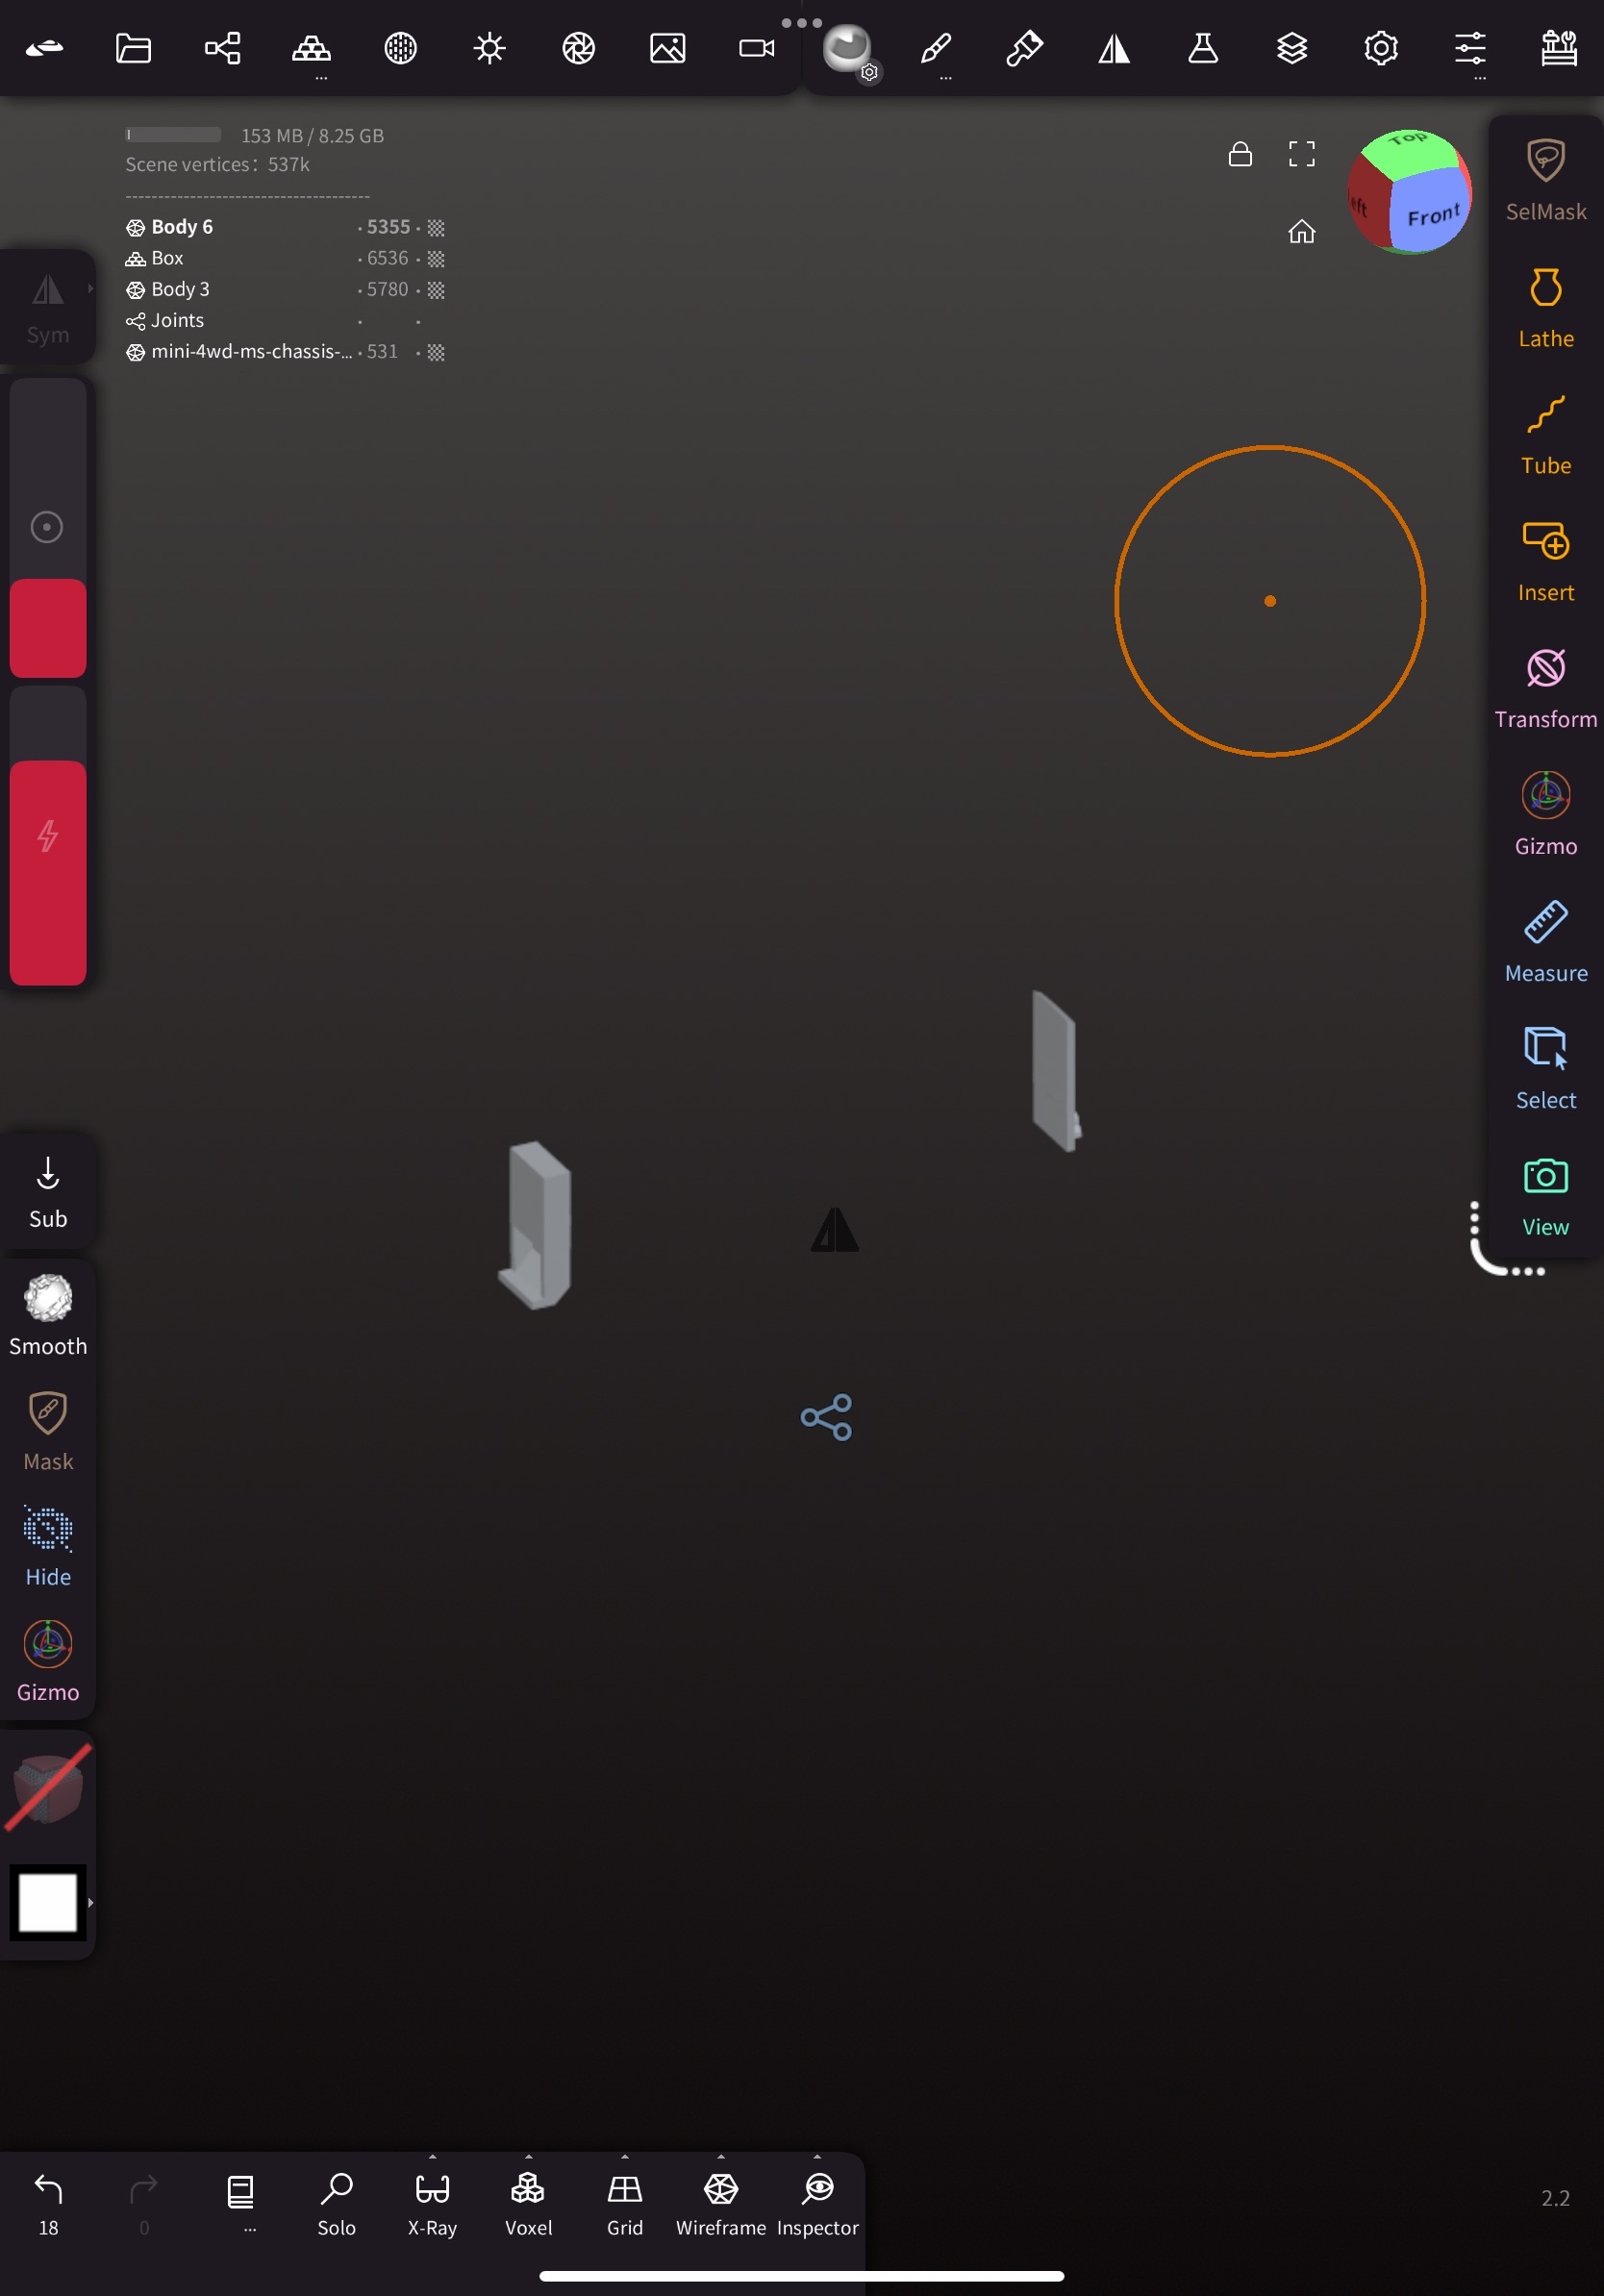
- Import the given Boolean unit. This boolean unit is on scale and simulates the shape of the Chassis, as well as the two joints that will be combined with the car cover.
Boolean unit
 Joint unit
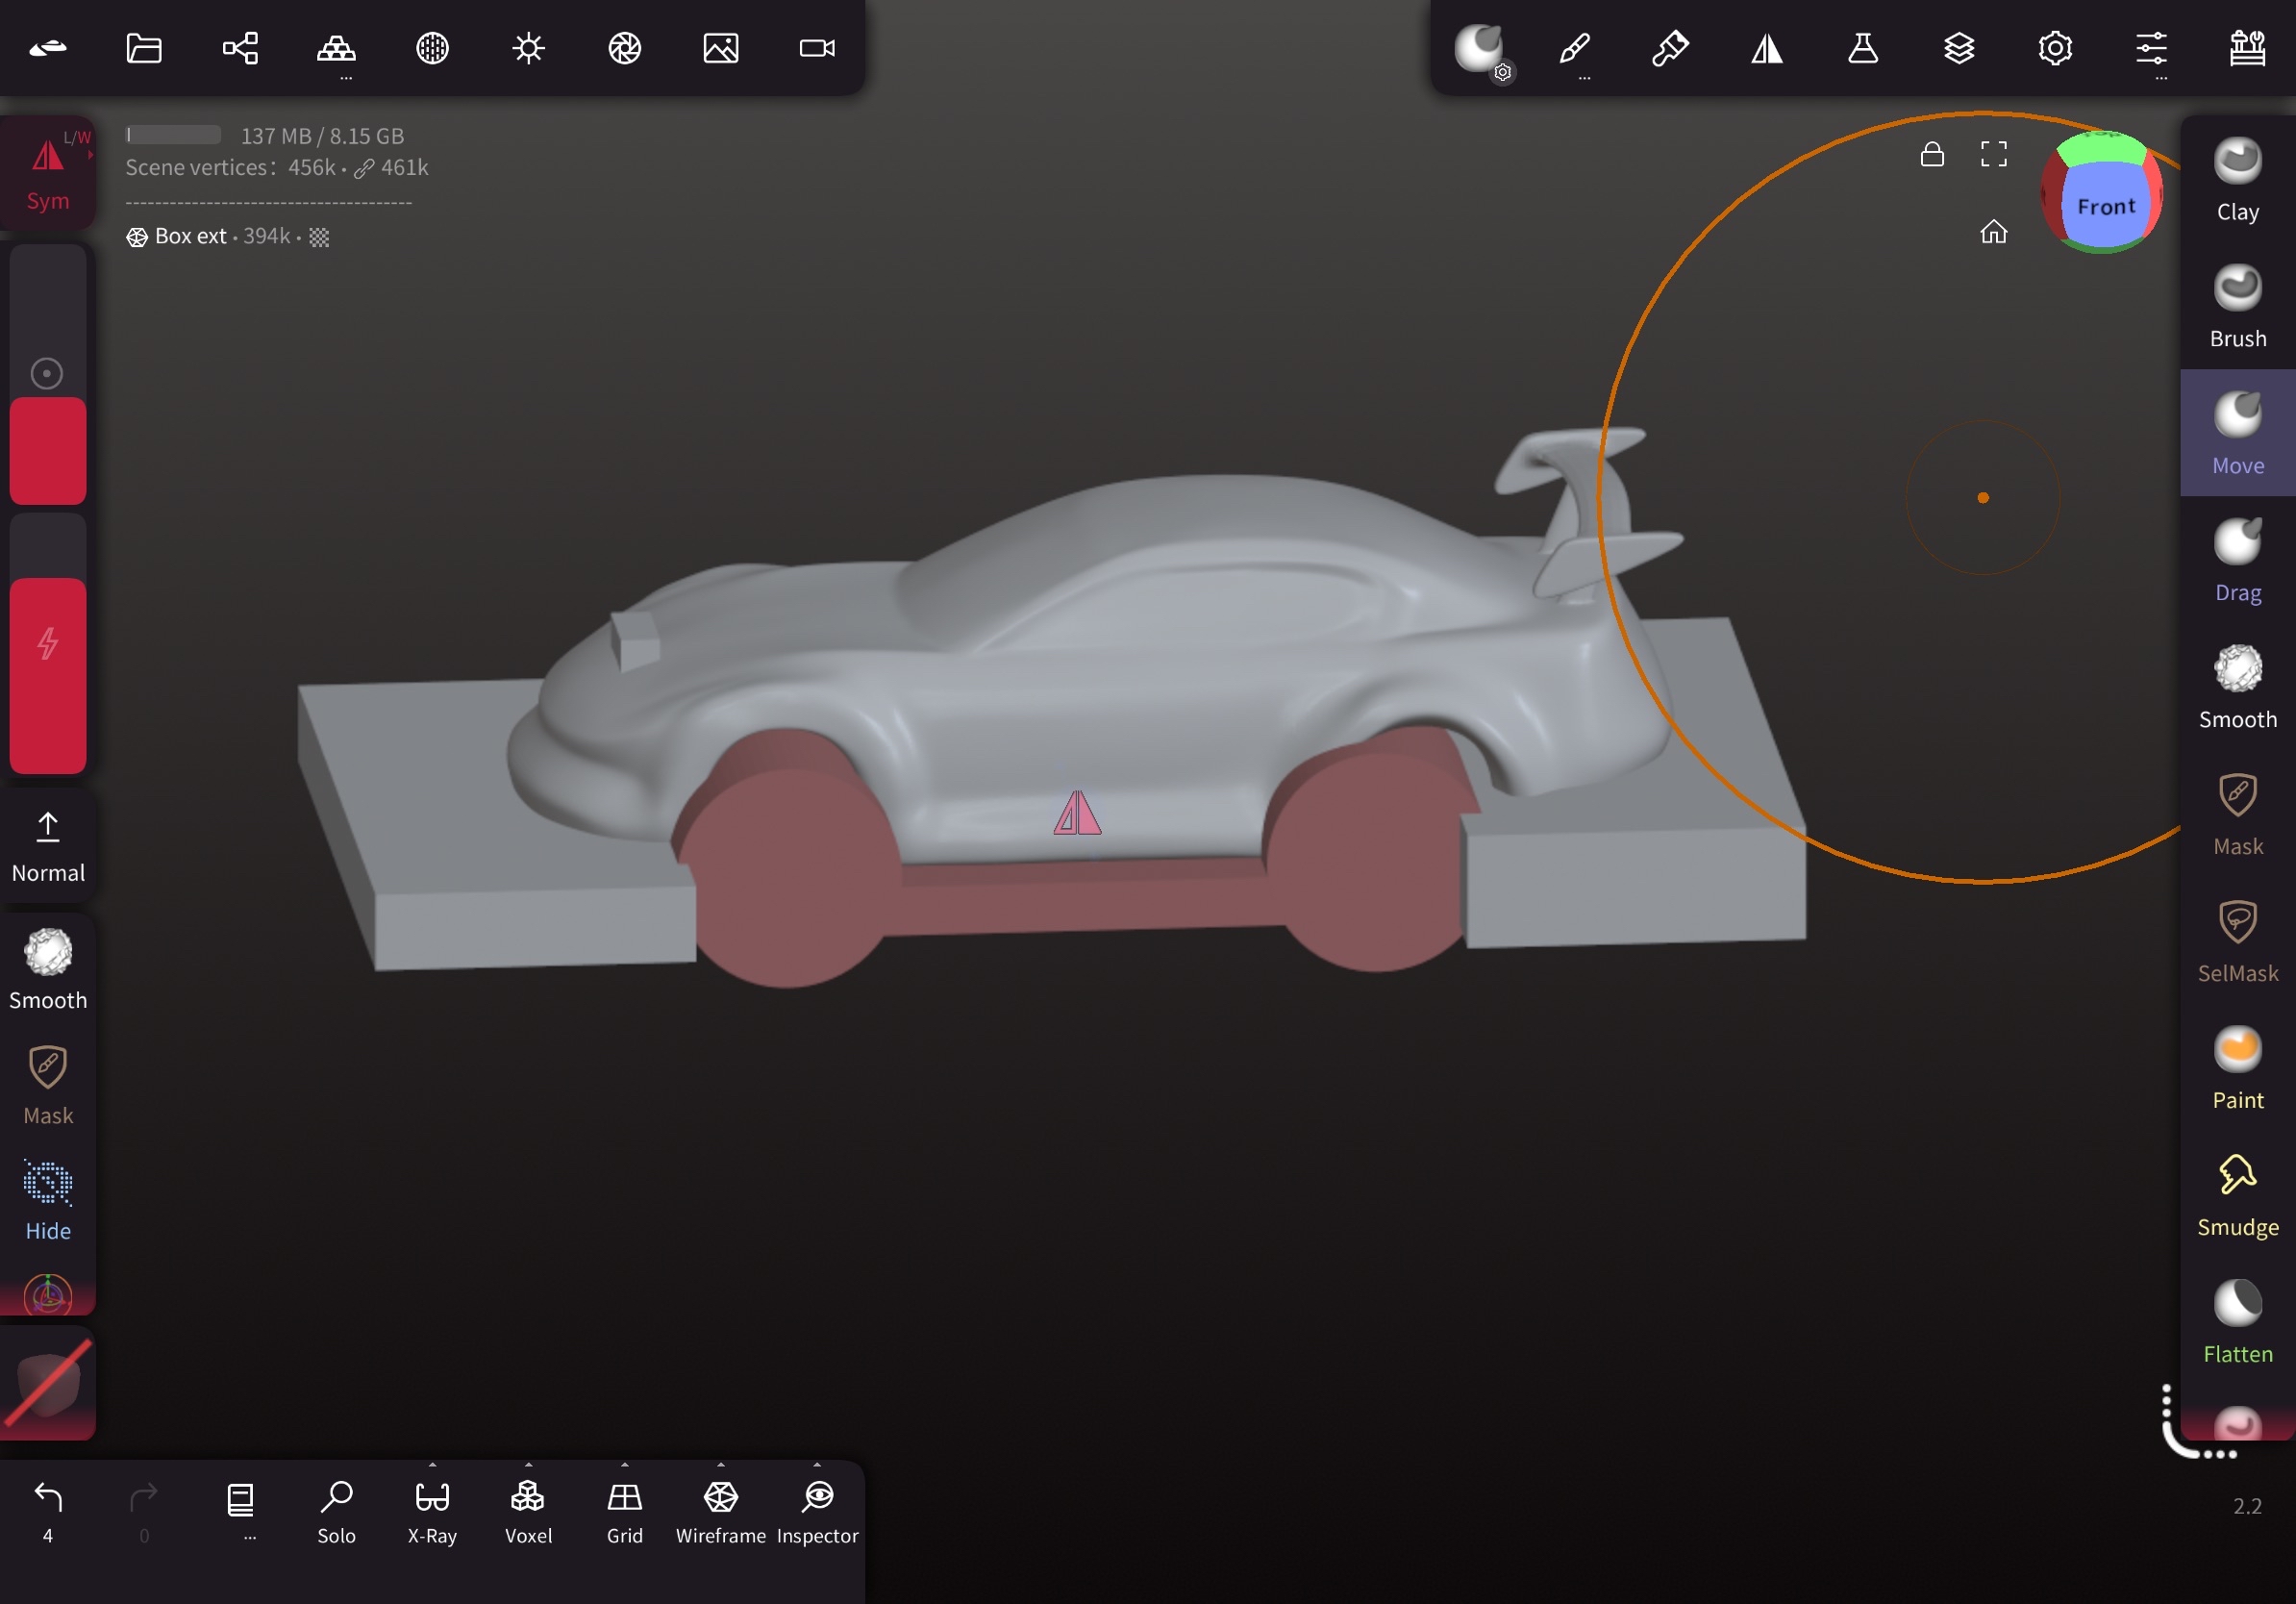
 Use gizmo, drag, move to adjust the car cover to fit on top of the boolean unit and fit the wheel position
Before
Use gizmo, drag, move to adjust the car cover to fit on top of the boolean unit and fit the wheel position
Before
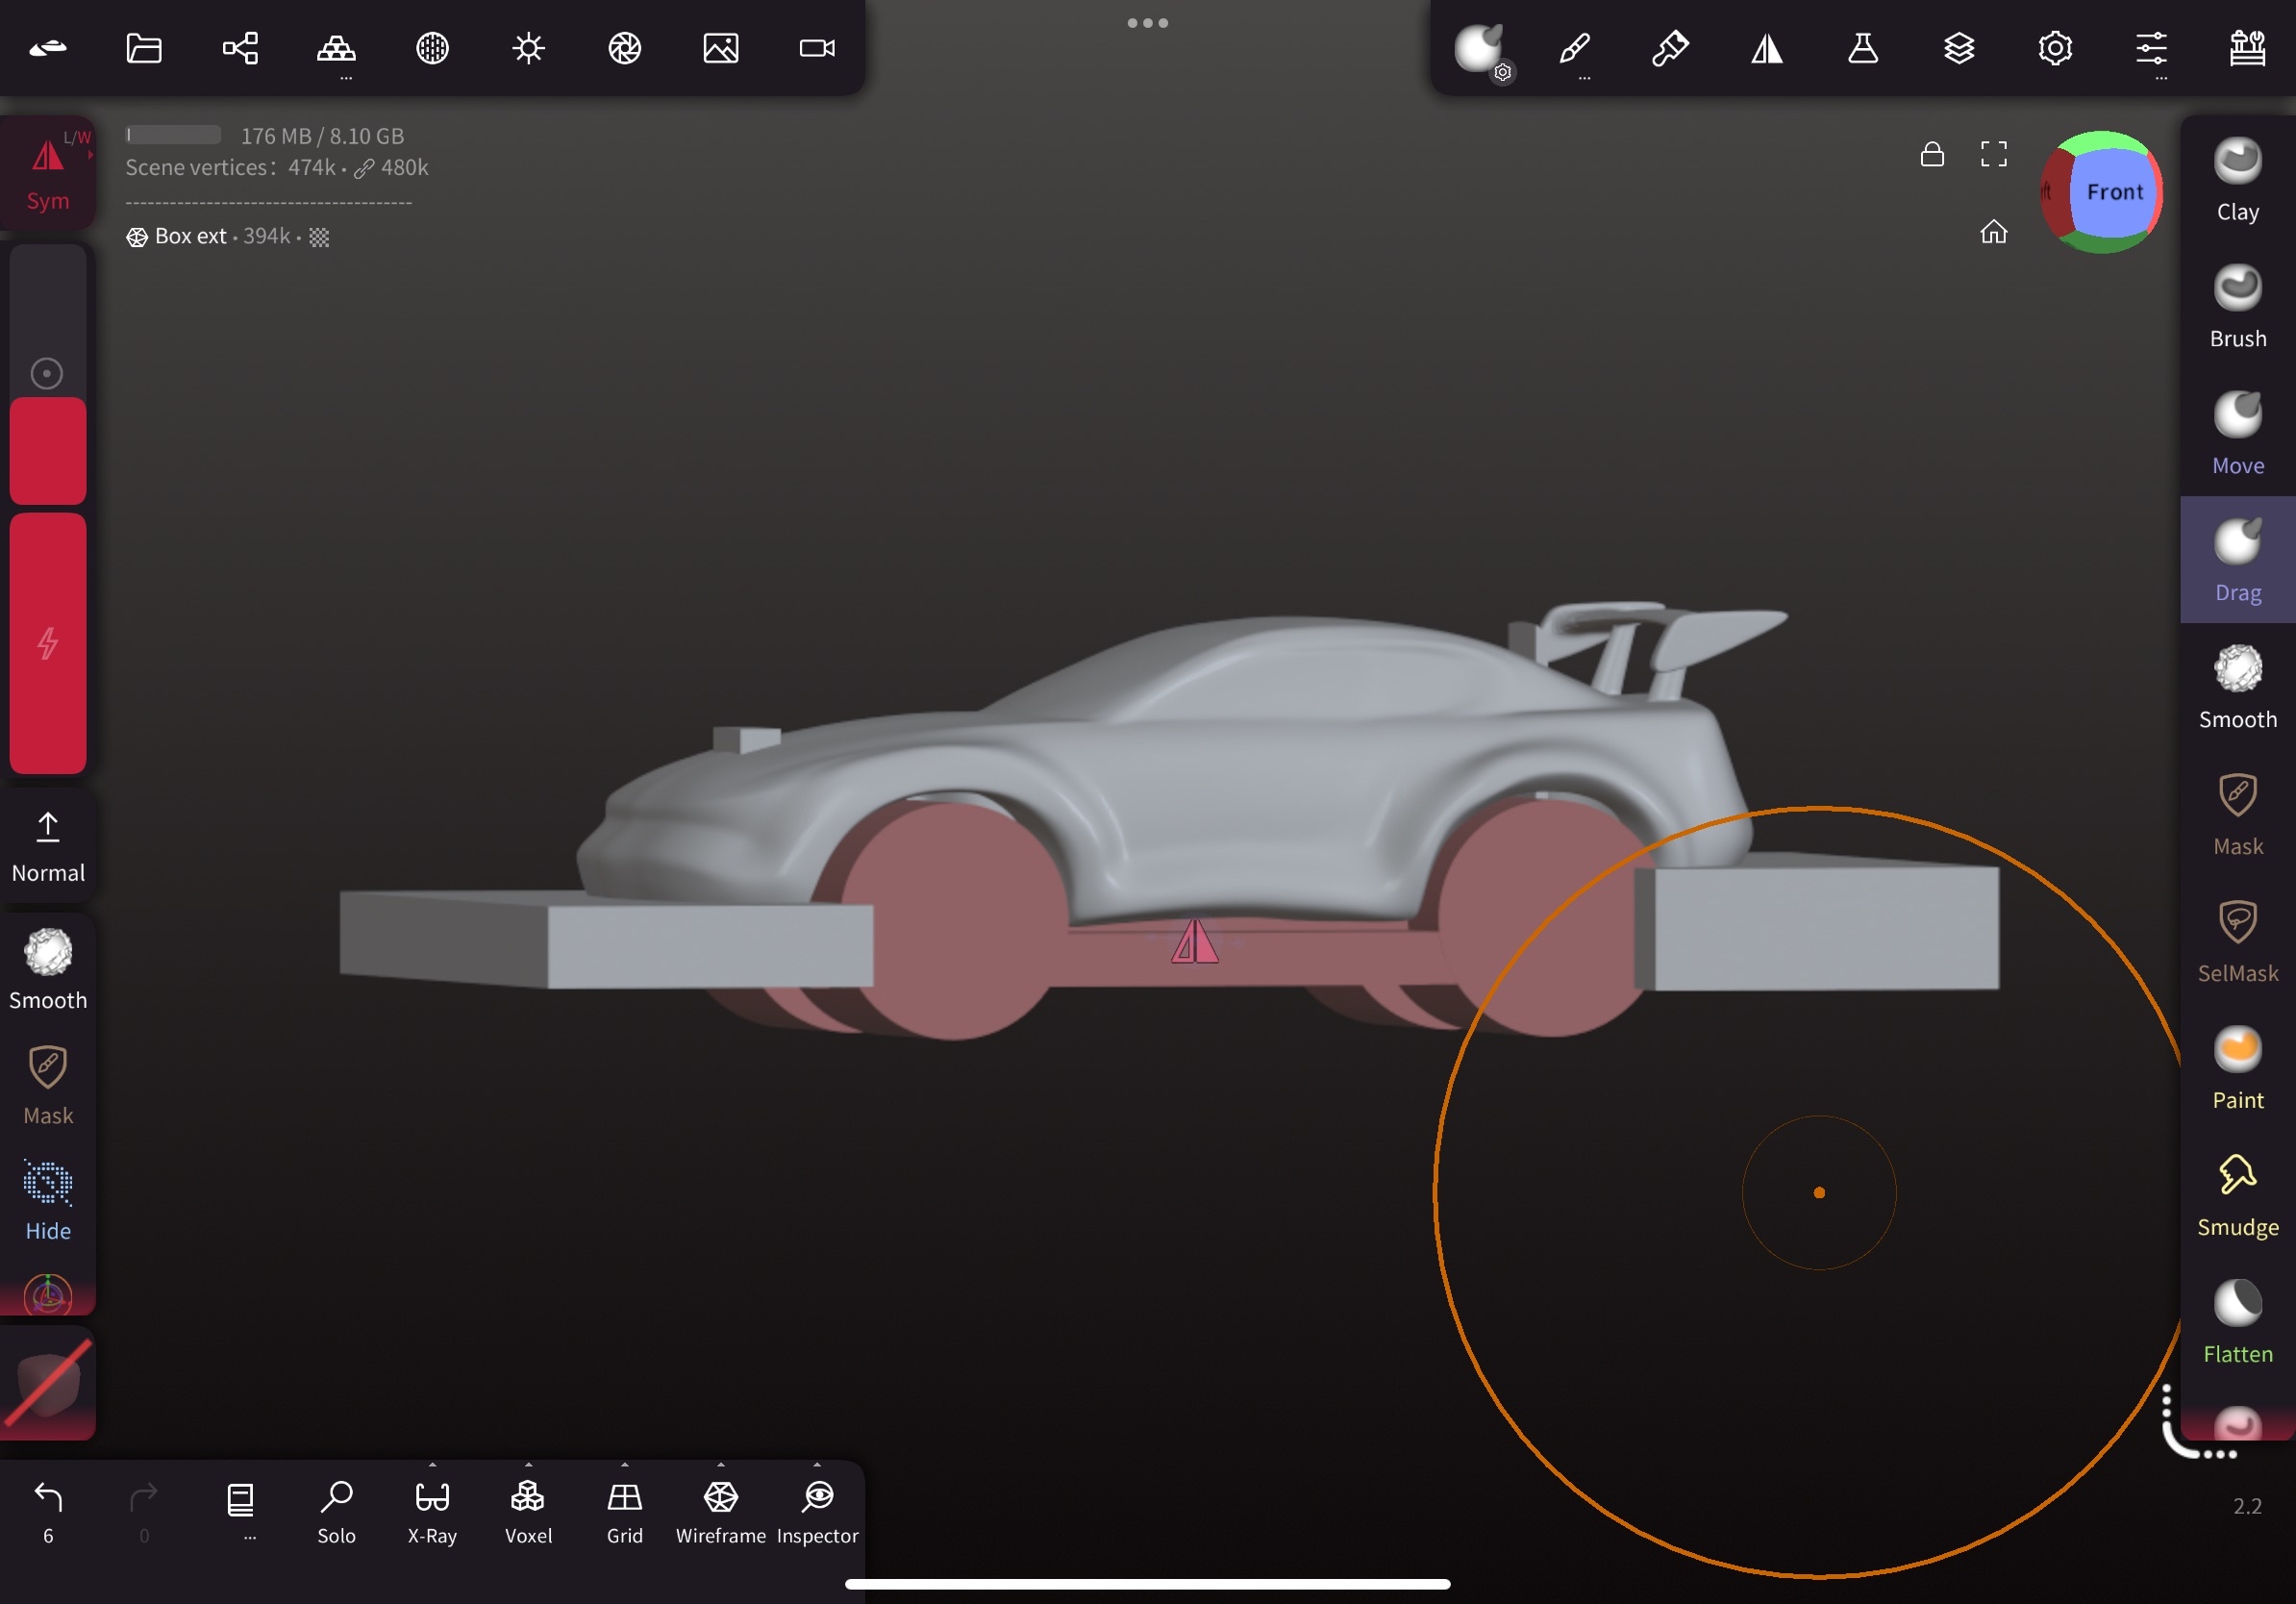
 After
After
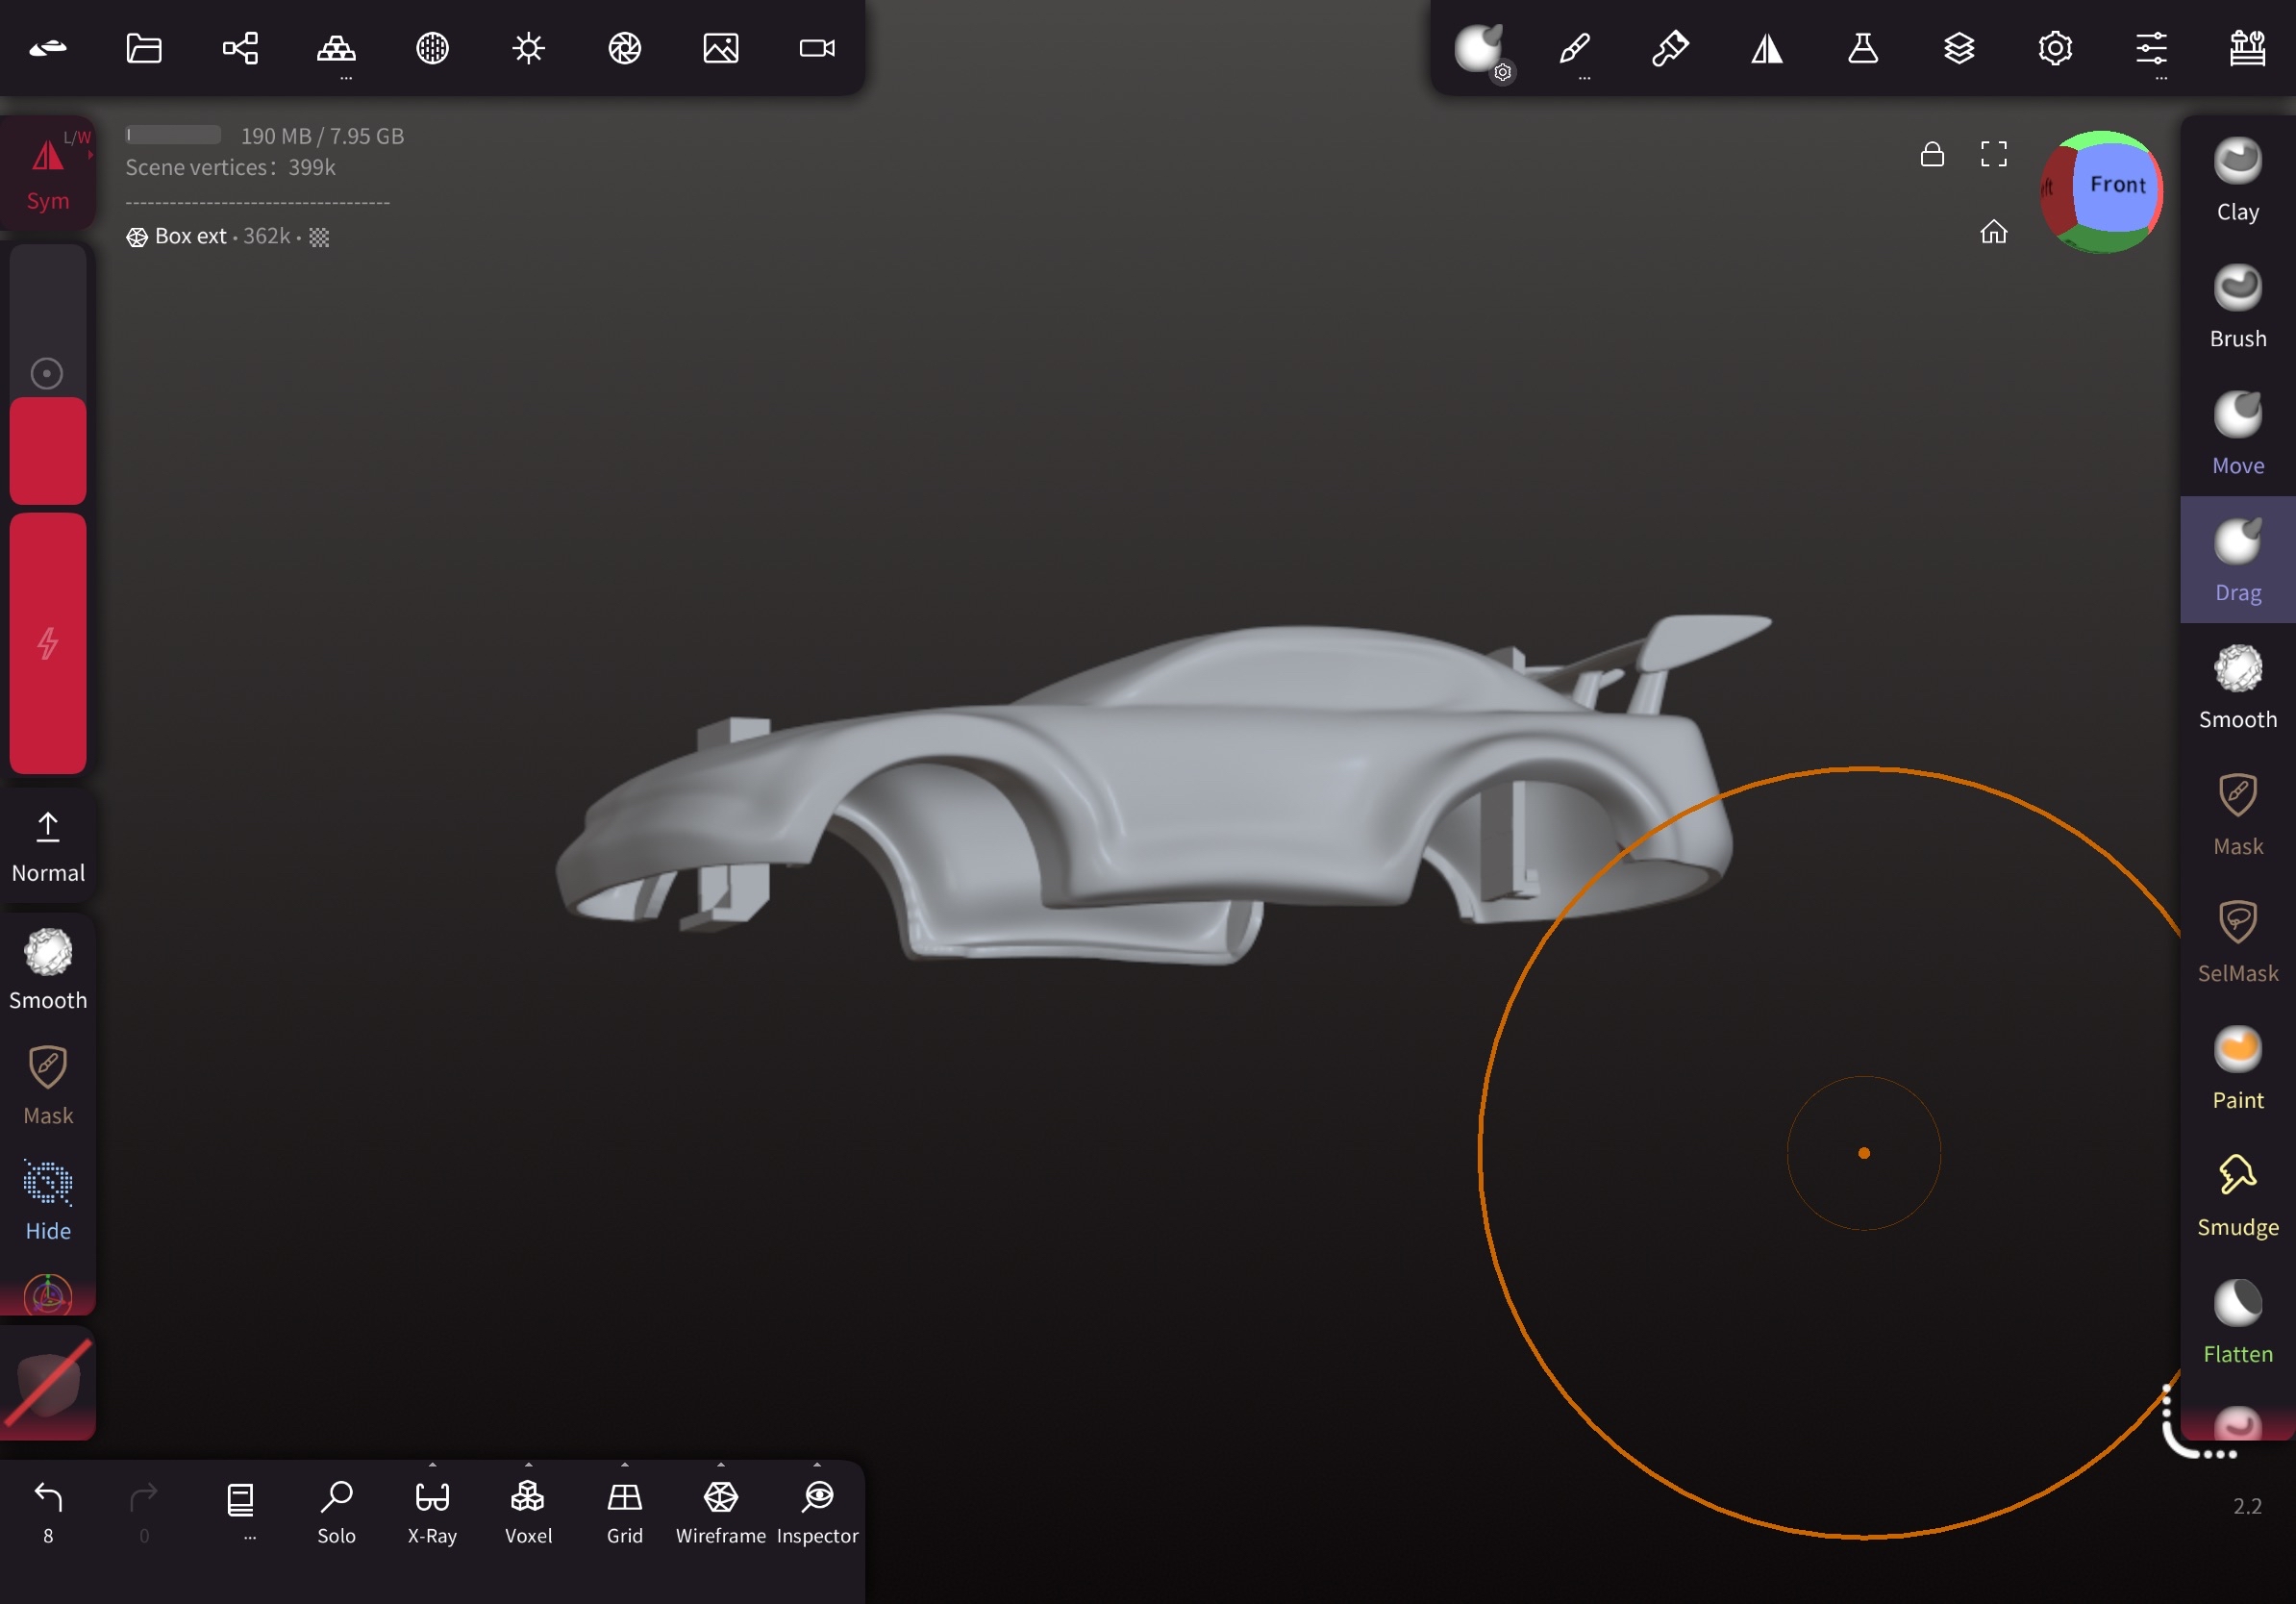
 Use boolean, subtract the Boolean unit from the car cover, to ensure there are no overlapping parts while assembling the car cover onto the chassis.
 Use boolean to combine the front and rear joints from the Joint Unit, and remove the excessive parts.
 Then the car cover is complete and ready for printing.
3. Preparing for 3D Printing
Objective: Export the 3D model for printing.
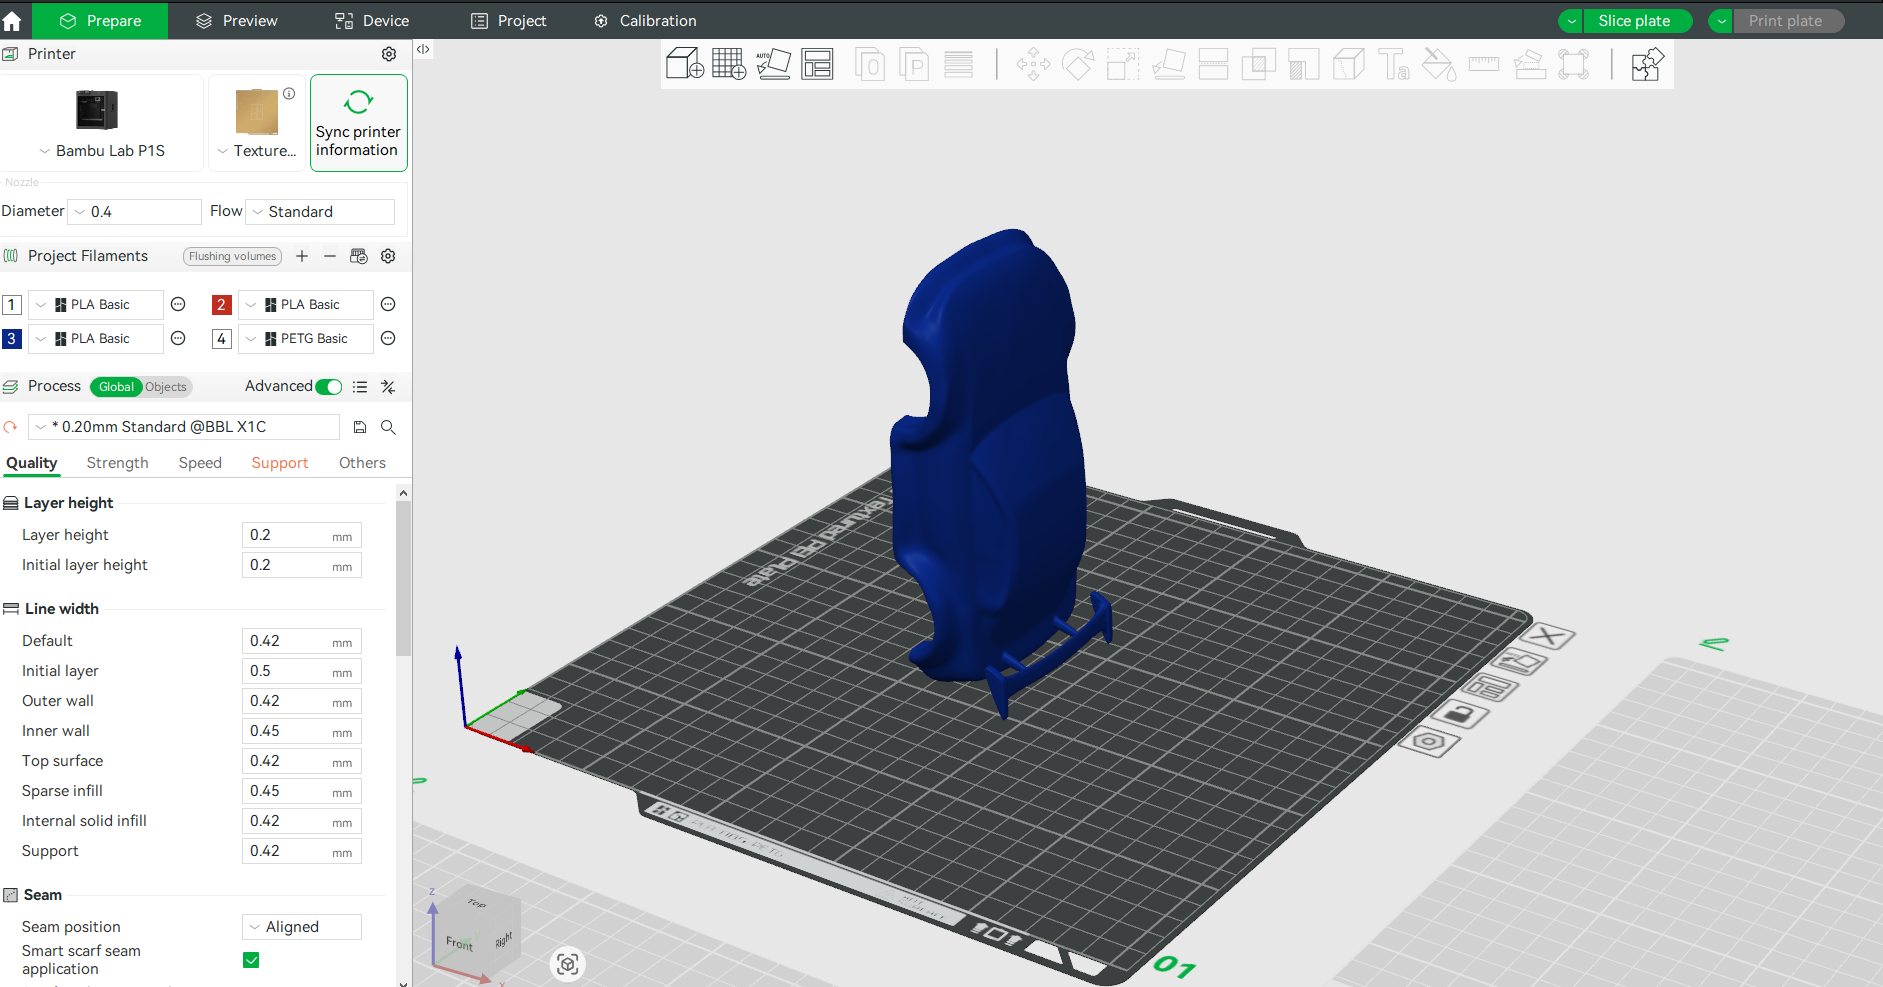
Content: 1. Export model from Nomad in STL format 2. Import into slicer software: - Adjust model orientation for optimal printing - Add support structures - Configure print settings (layer height, infill, etc.) 3. Generate G-code and print
Slicer Setup (Bambu Studio)
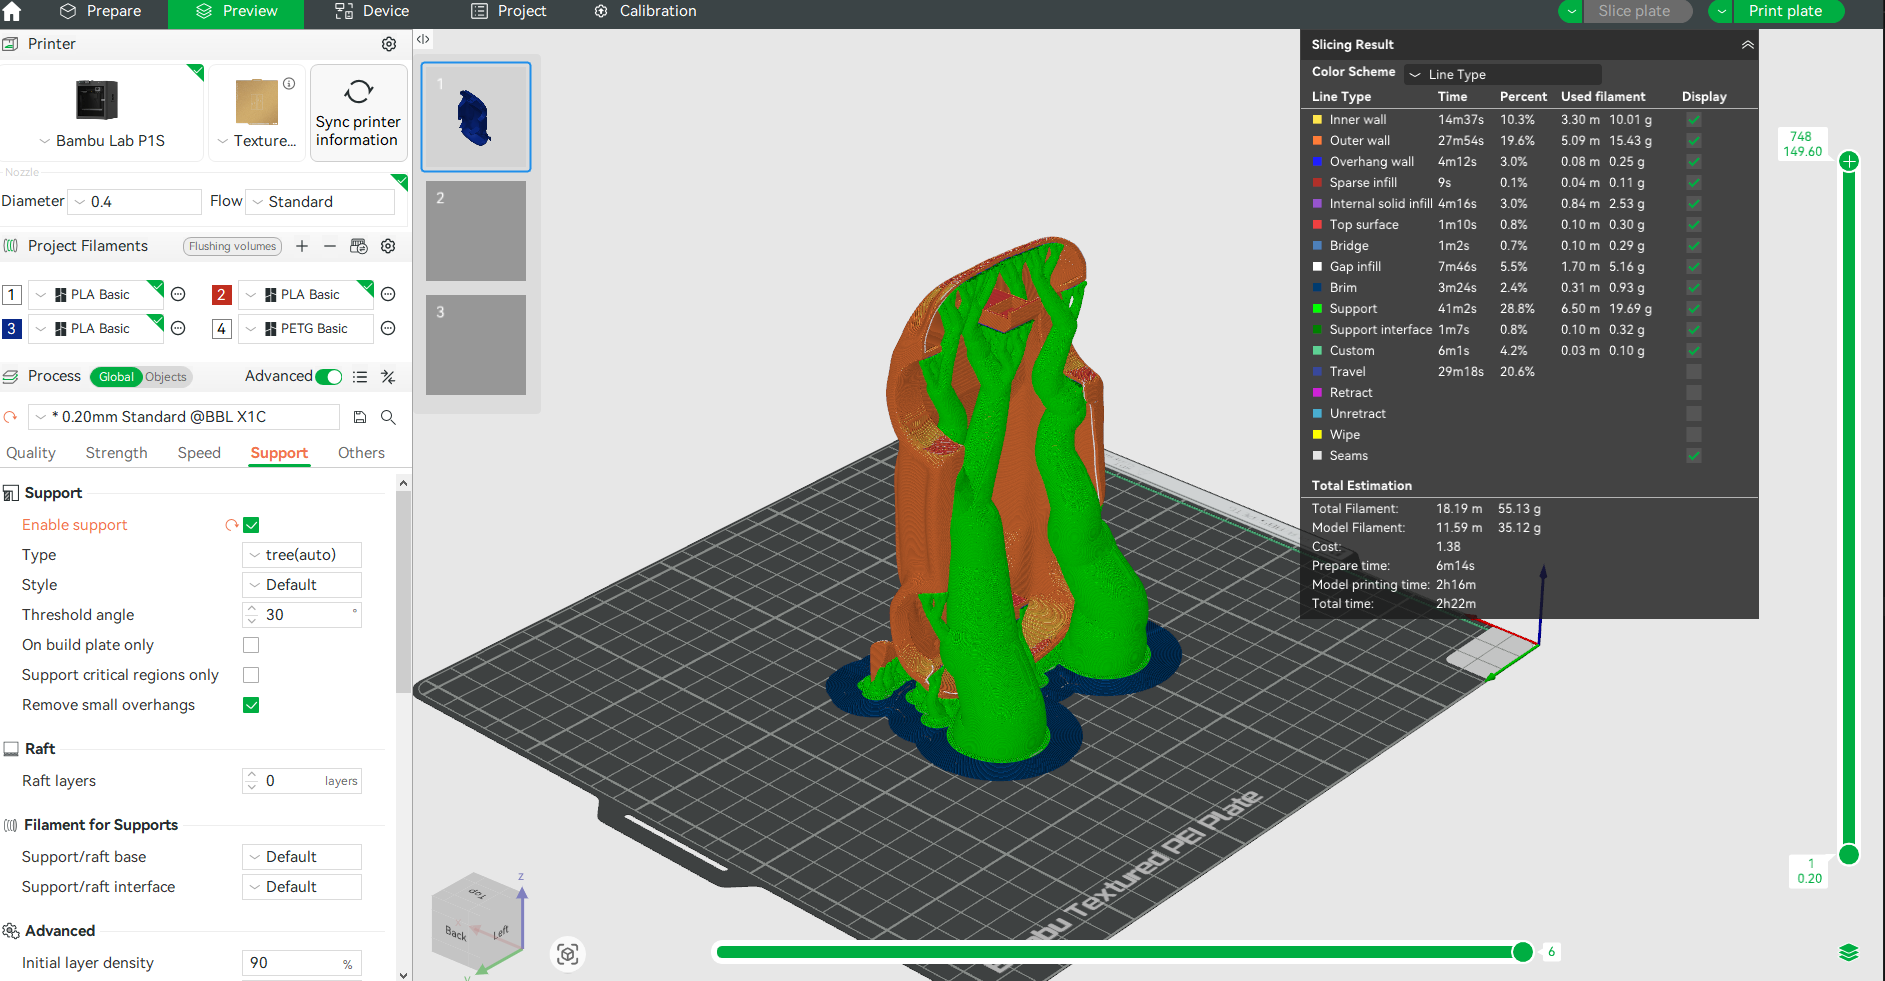
3D print preview
4. Post-processing, assembly and test running
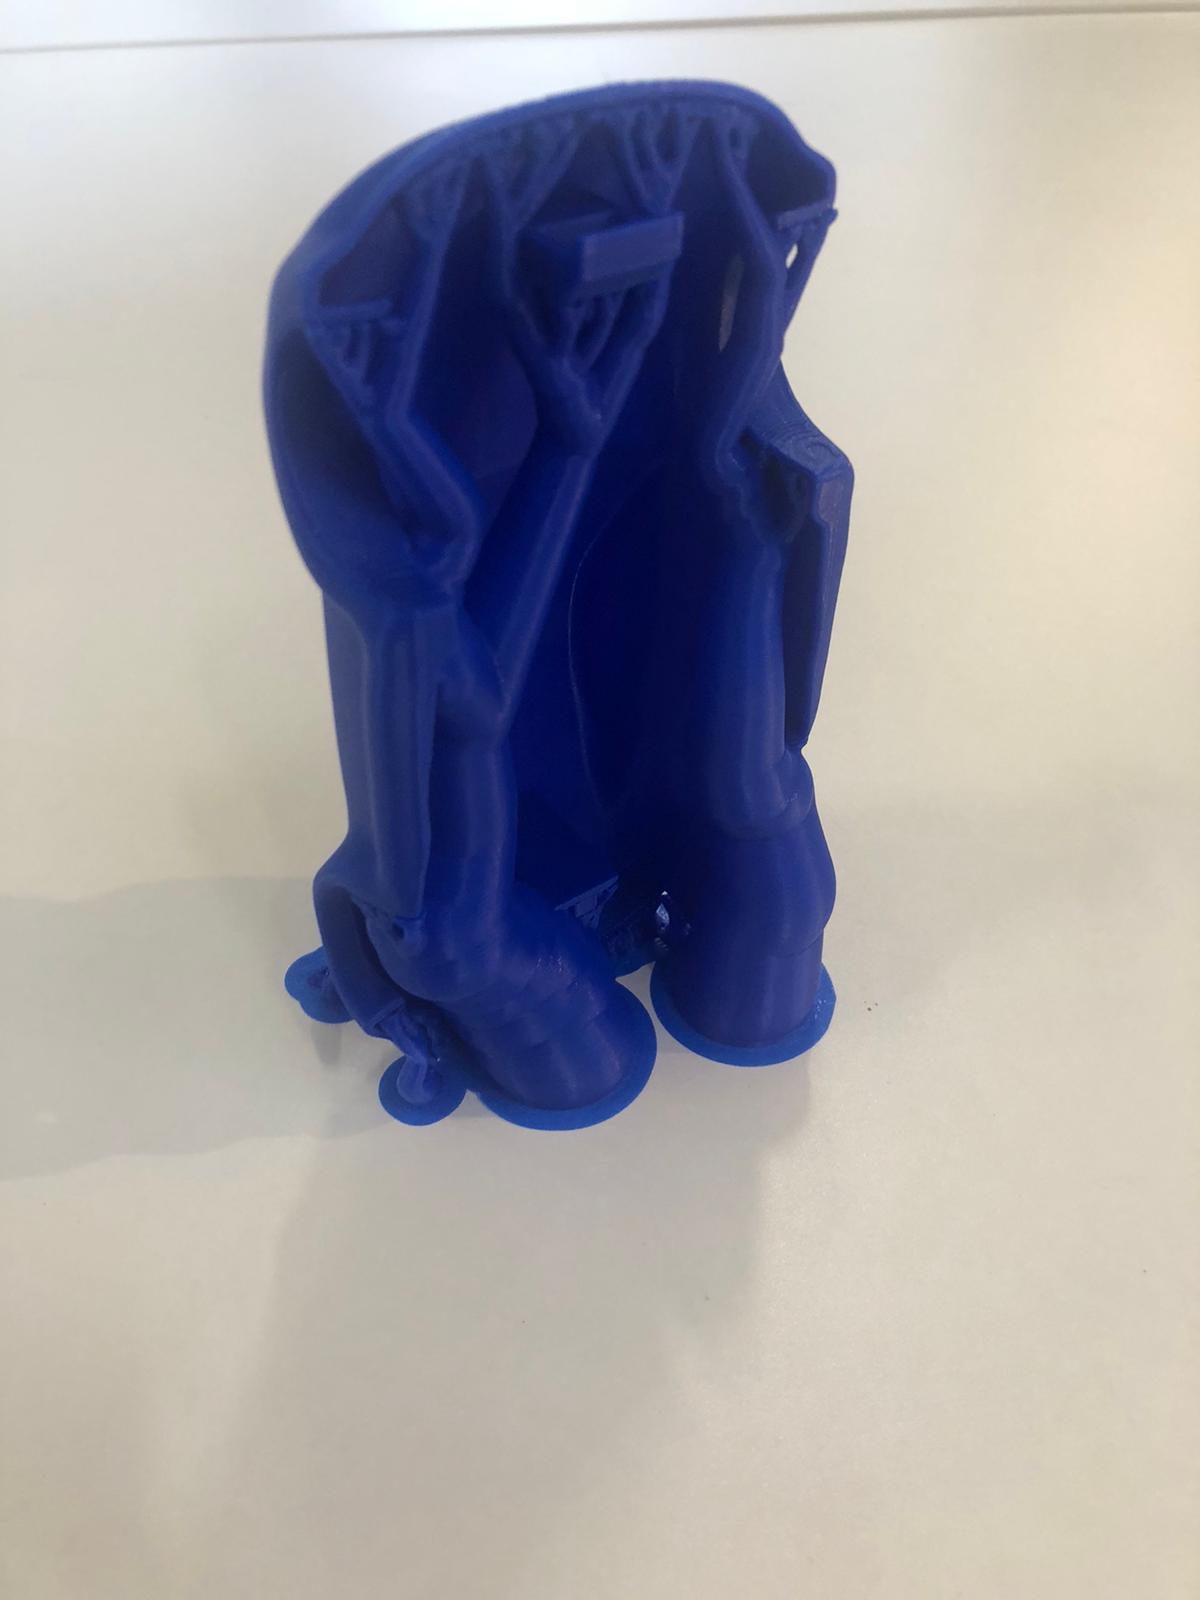
- Remove support structures
- sand the surfaces and support structure marks
- Assemble the car cover onto the Chassis
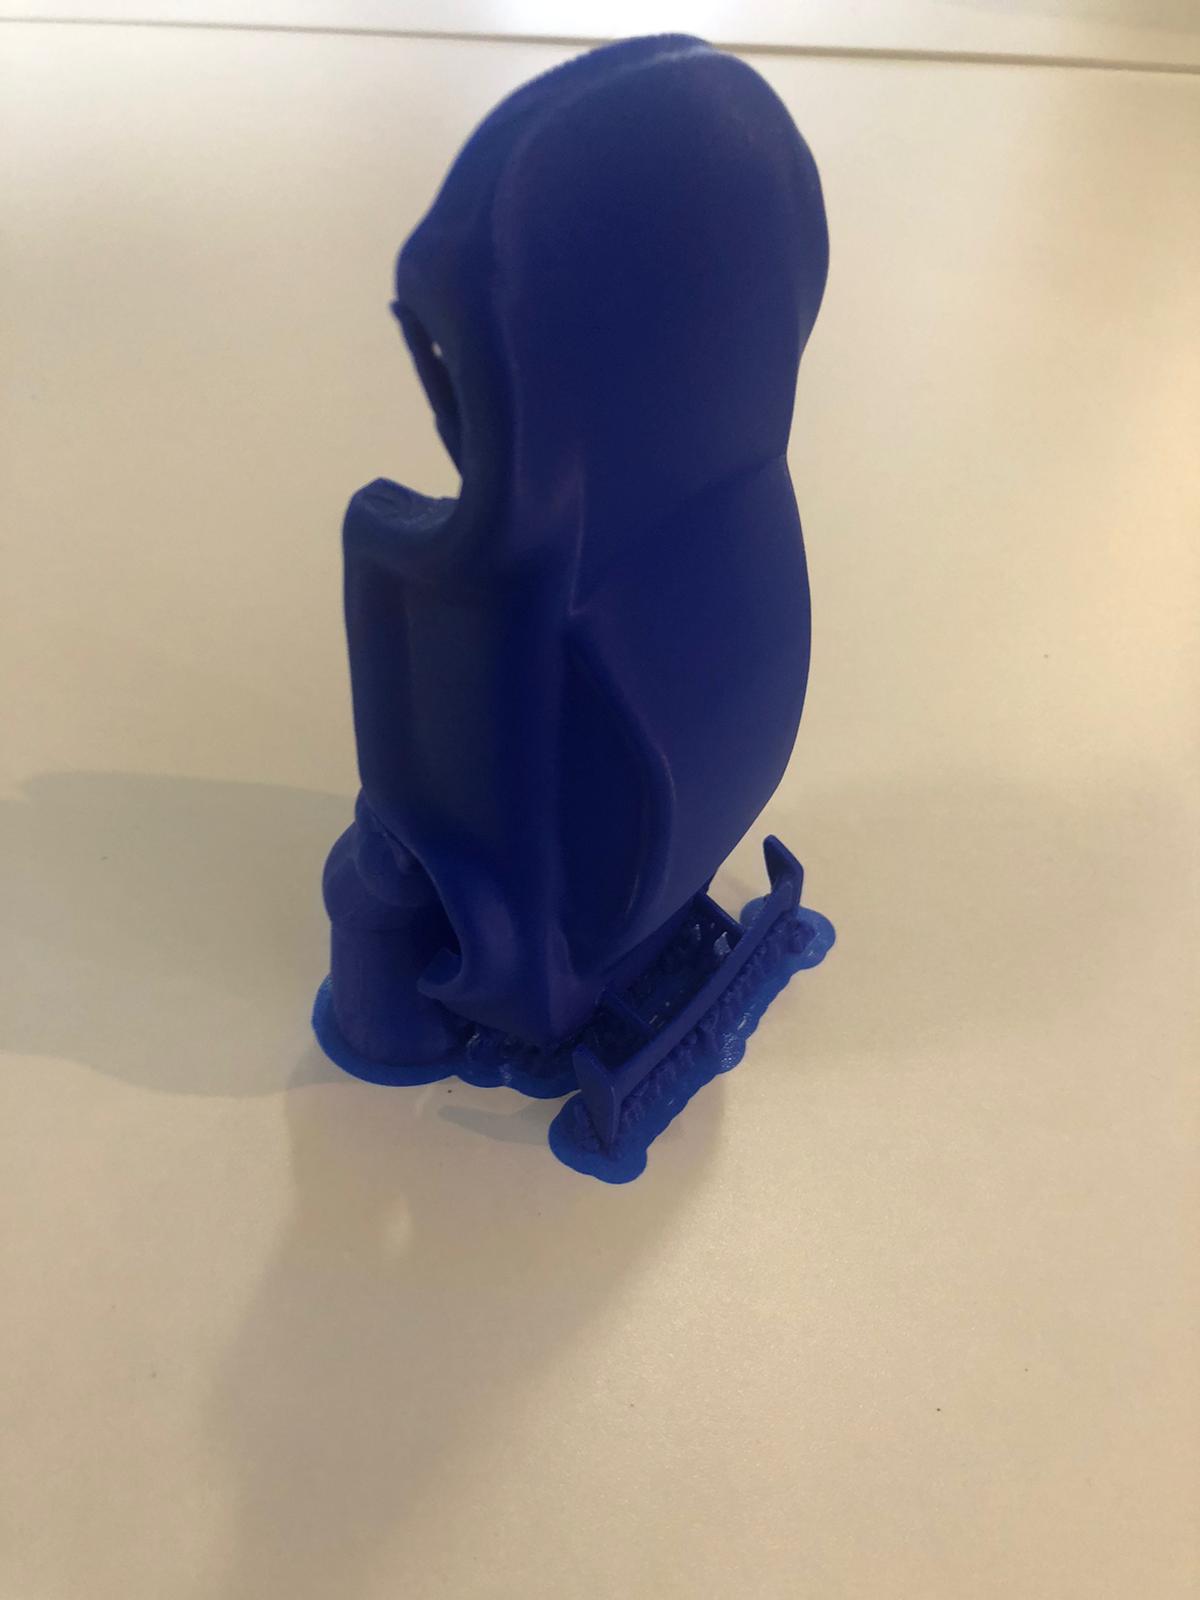
Printed model with support
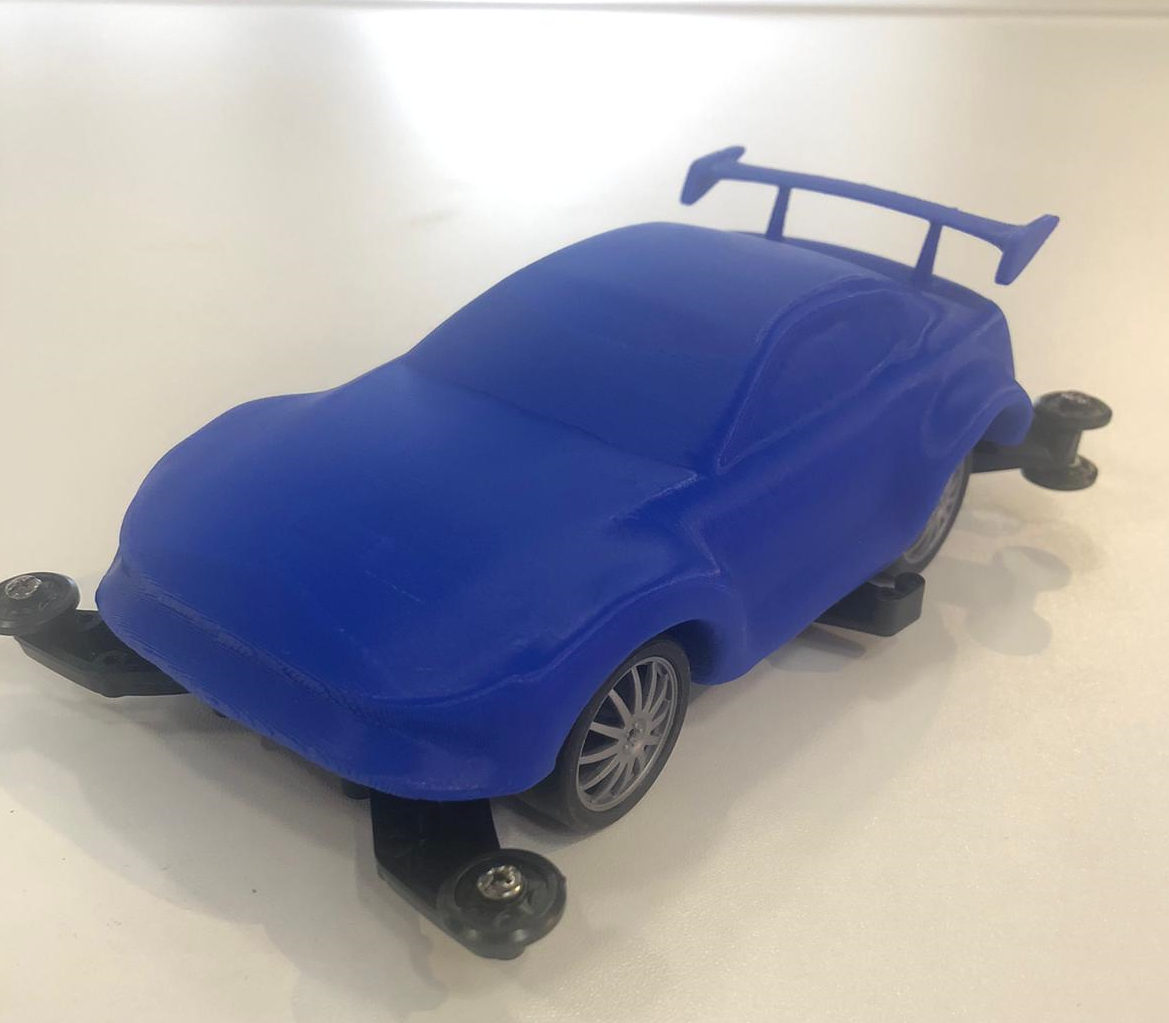
Assemble with the Tamiya 4WD Chassis
If it doesn't fit then adjust the model again.
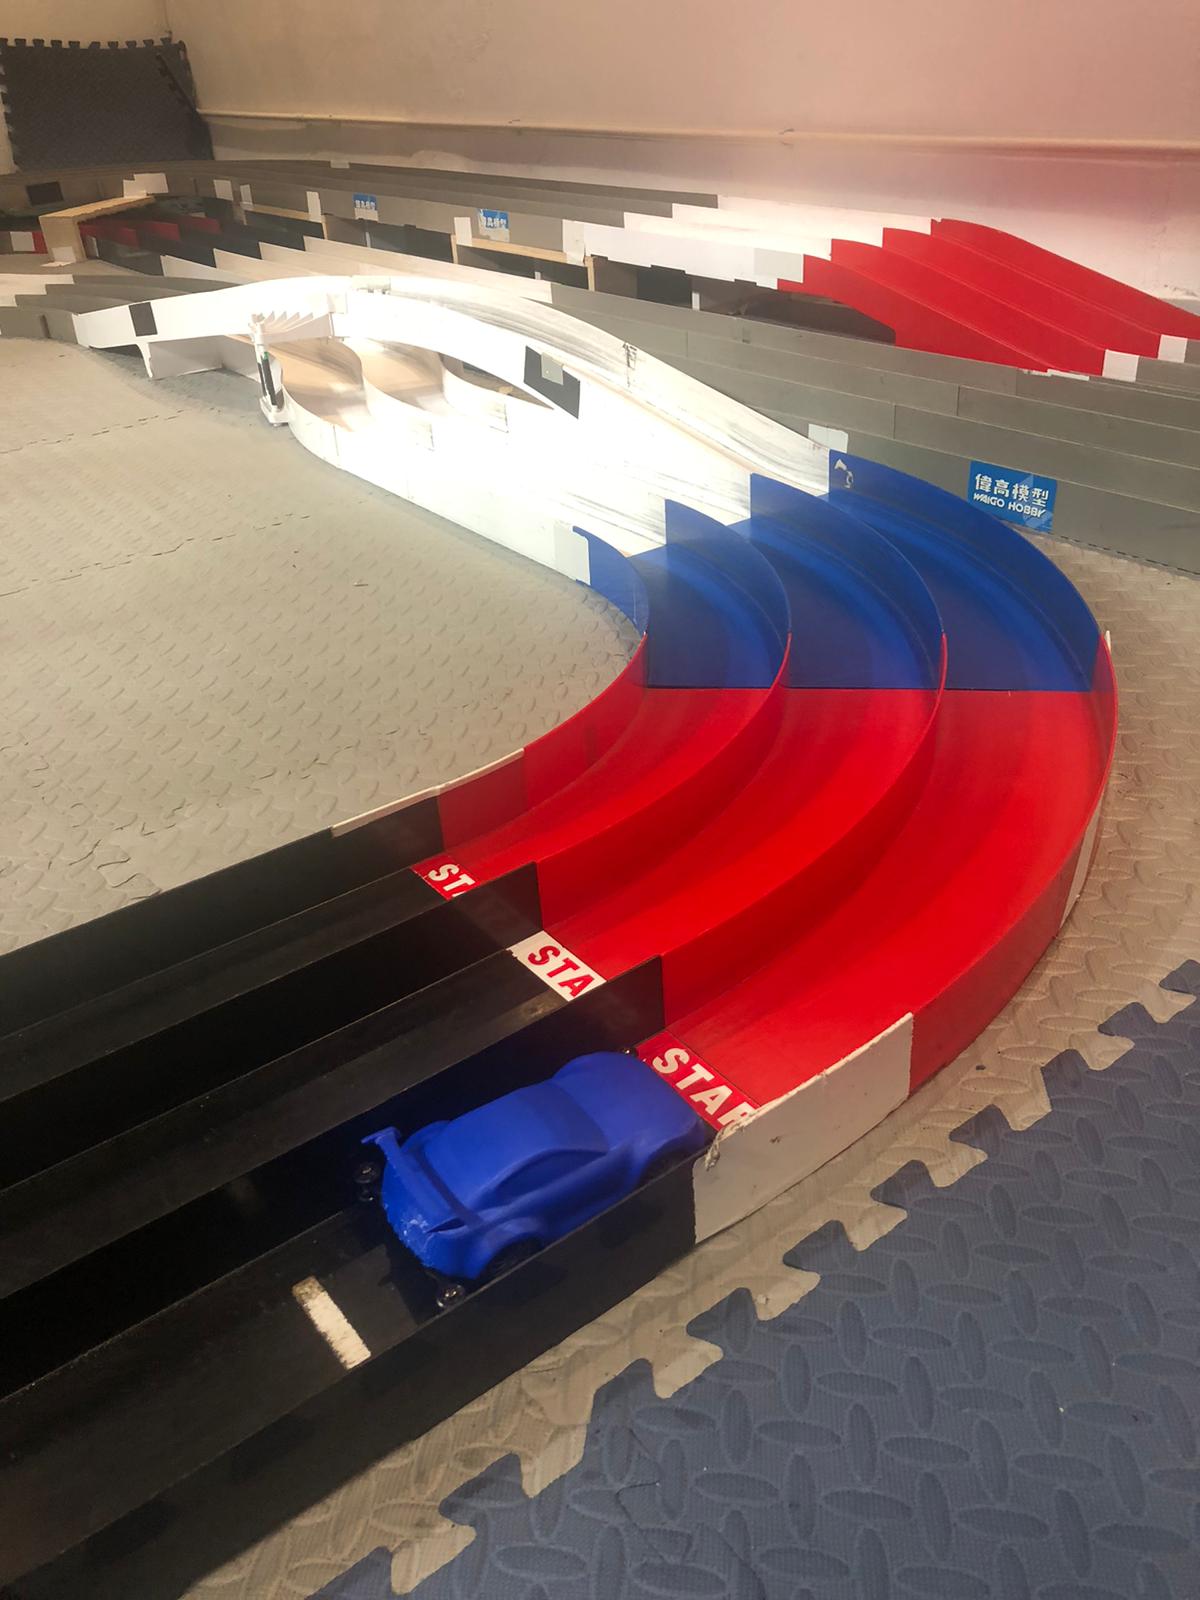
Now test run on the Tamiya racing tracks
Optional Projects
3D scanning
- 3D scanning can be used instead of AI model generation. Students can experience the process of scanning real life toy cars and import them into Nomad.
- Scanned models takes more time and proficiency to fix so this is not recommended for first timers.
- 3D scanner is required
Wind Tunnel Testing
- Learn about the basic aerodynamic principles and the usage of a wind tunnel
- Test different car designs for aerodynamic efficiency
- Observe the behaviour of Streamlines and compare them for different student designs
- Document results and make design improvements
- This is mainly aimed towards Physics/Engineering related students
- Desktop wind tunnel is required
painting
- Paint the printed car cover
- Let students be creatie with their design
- Learn different types of painting tools and techniques
Note: Images shown are placeholders. Replace with actual project photos.